Types of Astrophotography
Astrophotography divides into three distinct disciplines, each requiring different equipment, techniques, and levels of investment. Understanding which type matches your goals prevents wasting money on gear that does not fit your intended subjects.
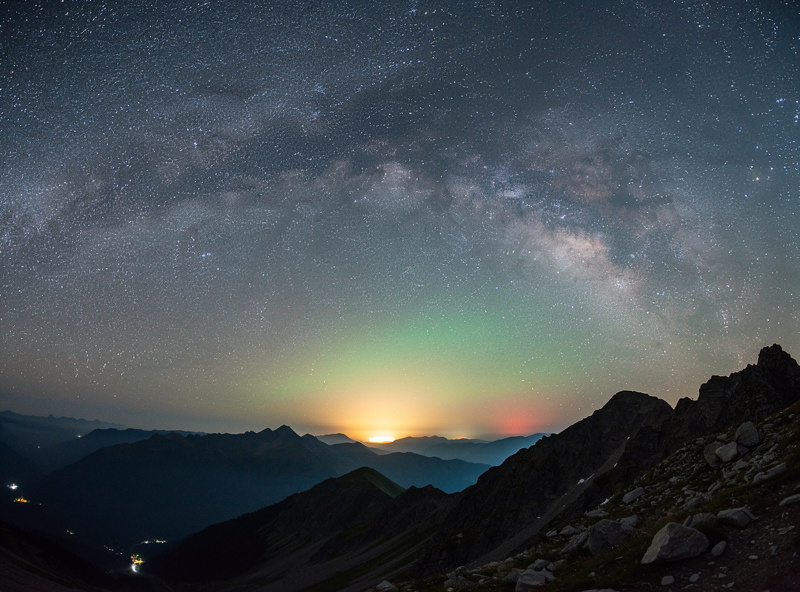
Widefield astrophotography captures large areas of the Milky Way, constellations, and meteor showers using camera lenses of 14-50mm focal length on a standard tripod or star tracker. This is the entry point — a DSLR or mirrorless camera with a fast f/2.8 wide-angle lens on a $250 star tracker produces publishable Milky Way images within a week of practice. Total investment: $500-$1,500.
Planetary astrophotography captures high-resolution images of Jupiter, Saturn, Mars, and the Moon using telescopes at long focal lengths (1500mm+) with high-speed video cameras. The technique — called lucky imaging — records thousands of video frames and stacking software selects the sharpest frames to produce a final image that surpasses what the eye sees through the eyepiece. Total investment: $800-$2,500.
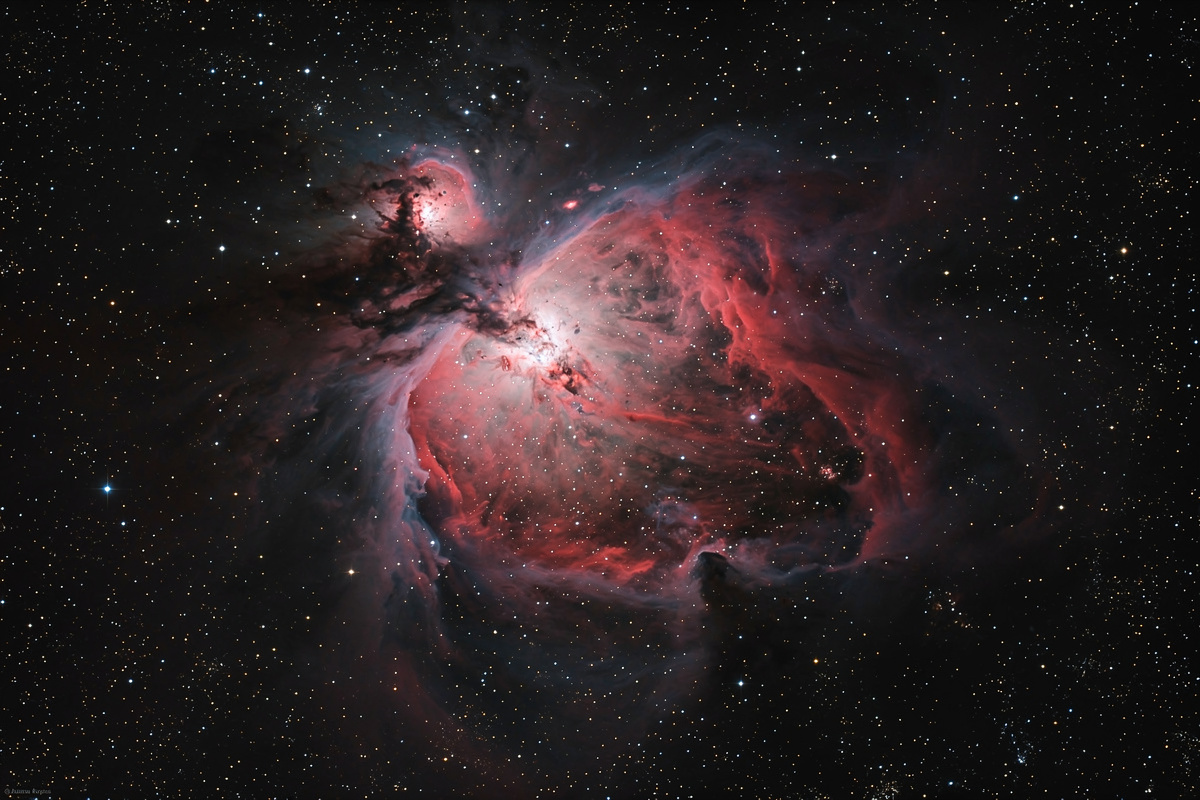
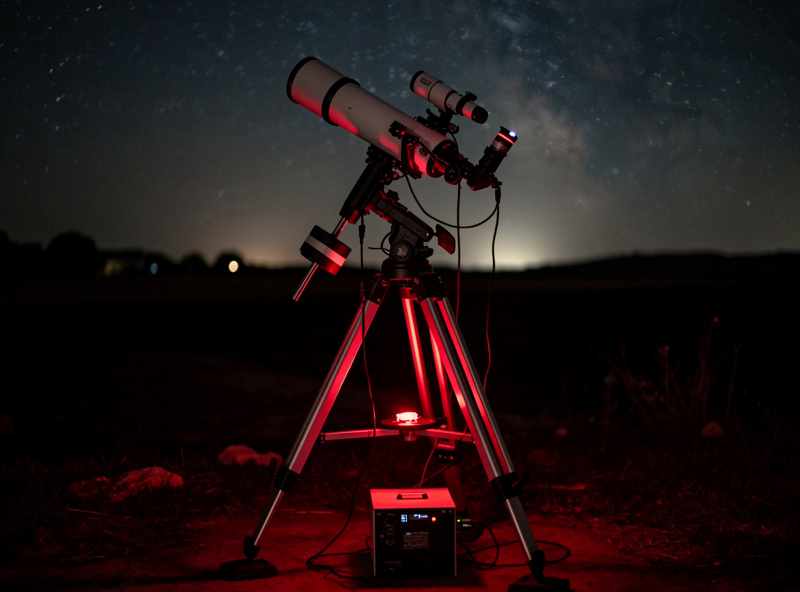
Deep-sky astrophotography captures faint nebulae, galaxies, and star clusters using long exposures (often 5-20 hours of total integration time) through telescopes on equatorial tracking mounts. This is the most demanding and expensive discipline but produces images that reveal structures invisible to the human eye — the glowing tendrils of the Veil Nebula, the spiral arms of M51, the pillars of creation in the Eagle Nebula. Total investment: $2,000-$10,000+.
Essential Astrophotography Equipment
The equipment requirements differ dramatically between astrophotography types. The following table outlines the core components for each discipline.
| Component | Widefield | Planetary | Deep-Sky |
|---|---|---|---|
| Camera | DSLR/mirrorless | Planetary camera (ZWO ASI224MC) | Cooled astro camera (ZWO ASI533MC Pro) |
| Optics | 14-50mm camera lens | Telescope 1500mm+ focal length | Apochromatic refractor or Newtonian |
| Mount | Star tracker (iOptron SkyGuider Pro) | Equatorial or alt-azimuth with tracking | Equatorial mount (HEQ5, EQ6-R) |
| Guiding | Not required | Optional | Mandatory — guidescope or OAG + guide camera |
| Software | DeepSkyStacker, Lightroom | FireCapture, AutoStakkert, RegiStax | NINA, PixInsight, Siril |
| Budget range | $500-$1,500 | $800-$2,500 | $2,000-$10,000 |
The equatorial mount is the single most important piece of deep-sky astrophotography equipment — more important than the telescope or camera. A $1,200 mount on a $400 telescope produces better images than a $400 mount on a $1,200 telescope because tracking accuracy determines whether stars are round or trailed in every exposure. Never skimp on the mount.
Camera Settings for Astrophotography
DSLR and mirrorless camera settings for widefield astrophotography follow a predictable starting point that you then adjust for your specific conditions.
ISO: Start at ISO 1600 for most modern cameras. Some sensors (Canon EOS Ra, Nikon Z6 II) produce cleaner images at ISO 3200. Higher ISO values increase signal but also amplify noise — the optimal ISO depends on your camera’s read noise characteristics. Test your specific camera at ISO 800, 1600, 3200, and 6400 and compare noise levels in the final stacked image.
Exposure time: For untracked widefield shots, use the 500 rule: divide 500 by your focal length to get the maximum exposure in seconds before stars begin to trail. At 24mm, that gives you 20 seconds. At 50mm, 10 seconds. With a star tracker, exposures of 2-5 minutes become possible at any focal length.
Aperture: Shoot wide open — f/2.8 on a wide-angle lens, f/4 on a camera zoom. Stopping down to f/4 or f/5.6 sharpens stars at the frame edges but halves or quarters your light gathering, requiring much longer total integration time.
File format: Always shoot RAW. JPEG compression destroys the subtle gradients and faint nebulosity that astrophotography captures. RAW files contain 14-bit data (16,384 tonal levels) versus JPEG’s 8-bit (256 levels). This 64x increase in data is essential for processing faint objects.
Image Stacking Basics
Image stacking is the process of combining dozens to hundreds of individual exposures to reduce random noise and reveal faint details invisible in any single frame. The signal (actual light from the object) accumulates linearly with more frames, while random noise grows only by the square root of the number of frames — a 60-minute stack (120 frames at 30 seconds each) has roughly 10 times the signal-to-noise ratio of a single 30-second exposure.
For widefield deep-sky images, free software like DeepSkyStacker (Windows) or Siril (cross-platform) handles the entire stacking workflow: load your light frames (the actual exposures), dark frames (matched exposures with the lens cap on to map sensor noise), flat frames (images of an evenly illuminated surface to correct vignetting), and bias frames (shortest possible exposures to map read noise). The software aligns the stars across all frames, removes noise patterns, and outputs a single integrated image for processing.
Processing the stacked image is where art meets science. Stretch the histogram to reveal faint nebulosity while preserving star colors. Apply selective noise reduction to smooth background areas without destroying star detail. Adjust color balance to correct for light pollution gradients. PixInsight ($260) is the professional standard; free alternatives like Siril and GIMP handle 90% of processing needs for beginners.
Smartphone Astrophotography
Modern smartphones with dedicated night modes produce surprisingly capable astrophotography. The iPhone 15 Pro, Google Pixel 8, and Samsung Galaxy S24 all include multi-second astrophotography modes that stack internal frames automatically. Results are impressive for Milky Way snapshots and constellation captures when combined with a small phone tripod ($15-$25).
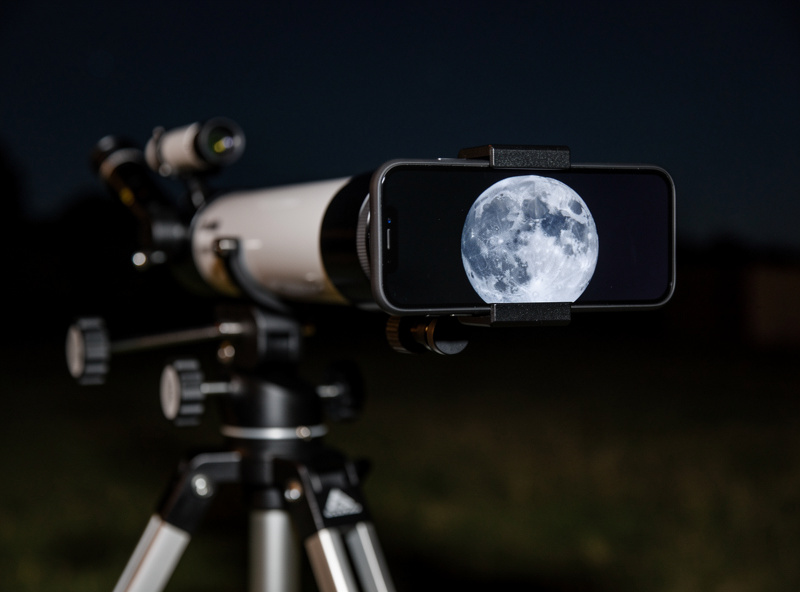
For telescope-based smartphone astrophotography, a universal phone adapter ($20-$40) aligns your phone camera with the telescope eyepiece. This method works well for lunar photography — the Moon is bright enough that phone cameras capture detail through the eyepiece at moderate magnification. Planetary imaging is possible but limited; phone cameras lack the frame rate and sensitivity of dedicated planetary cameras.
The most capable smartphone astrophotography technique uses an app like NightCap or ProCam that allows manual control of exposure time, ISO, and focus lock. Mount the phone on a star tracker for 15-30 second tracked exposures and stack the results in Sequator (free, Windows) for Milky Way images that rival entry-level DSLR results. See our astronomy for beginners guide for starting with smartphone observation before investing in dedicated camera equipment.
Getting Started: First Astrophotography Session
Start with the Moon. It is bright, easy to find, and does not require tracking — even a Dobsonian telescope captures excellent lunar images with a phone adapter or a $100 planetary camera. The first quarter Moon (when the terminator crosses the middle of the disk) shows the most dramatic shadows in crater floors and along mountain ranges.
Your first deep-sky target should be the Orion Nebula (M42), visible December through March. It is the brightest nebula in the northern sky and shows structure even in 30-second untracked exposures. Point your camera at Orion’s sword (below the three belt stars), set ISO 3200 at f/2.8, expose for 15-20 seconds, and stack 50 frames. The resulting image will show the glowing pink and blue gas cloud surrounding the Trapezium star cluster at its center.
Join online communities for feedback and learning. The r/astrophotography subreddit has over 1 million members who share images with full acquisition details (equipment, settings, processing steps). Cloudy Nights’ astrophotography forum provides equipment-specific advice. Both communities welcome beginners and provide constructive critique that accelerates learning faster than solo experimentation. Our best planets to observe guide identifies the best planetary imaging targets by date.
Frequently Asked Questions
What is the cheapest way to start astrophotography?
Use a smartphone on a $20 tripod with the built-in night mode to capture Milky Way images and star trails. For telescope astrophotography, a $100 planetary camera like the ZWO ASI120MC-S attached to any telescope captures lunar and planetary images that rival dedicated astrophotography setups.
Do I need a tracking mount for astrophotography?
Not for planetary imaging (short video exposures) or widefield constellation shots (under 20 seconds). For deep-sky astrophotography at focal lengths above 50mm, a star tracker ($250) or equatorial mount ($800+) is mandatory to prevent star trailing in long exposures.
How many exposures should I stack for deep-sky images?
Aim for at least 30-60 minutes of total integration time. For bright objects like the Orion Nebula, 30 frames of 60 seconds each (30 minutes) produces usable results. For fainter objects like the Horsehead Nebula, 2-3 hours of total exposure provides clean, detailed images with low noise.
Can I do astrophotography with a Dobsonian telescope?
Yes, for lunar and planetary imaging. Dobsonians lack equatorial tracking, limiting deep-sky exposures to 15-30 seconds before field rotation becomes visible. An equatorial platform ($300-$500) adds 30-60 minutes of tracking and enables basic deep-sky imaging with a Dobsonian.
What camera is best for astrophotography beginners?
For widefield: use your existing DSLR or mirrorless camera. For planetary: the ZWO ASI224MC ($300) is the standard entry point. For deep-sky: the ZWO ASI533MC Pro ($1,100) offers cooled sensor performance with no amp glow, or use a modified DSLR ($400 used) as a budget alternative.
How long does it take to process an astrophotography image?
Planetary images take 15-30 minutes of processing in AutoStakkert and RegiStax. Deep-sky images require 2-6 hours of processing in PixInsight or Siril, including stacking, gradient removal, color calibration, noise reduction, and histogram stretching. Expect to spend as much time processing as capturing.