
Sharpening recovers fine detail that seeing, tracking error, and your optics blurred away. It comes in two very different forms: deconvolution, a heavyweight that mathematically reverses a measured blur on linear data and genuinely restores resolution, and cosmetic sharpening, which adds local contrast after stretching to make existing structure pop. Both reward restraint — over-sharpening creates dark halos around stars and turns noise into fake detail.
Used carefully, sharpening is what makes a galaxy’s spiral arms crisp and a nebula’s filaments distinct. Used carelessly, it is the fastest way to ruin an otherwise clean image. This guide separates true deconvolution from cosmetic sharpening, shows where each belongs in the processing pipeline, and explains why the atmosphere sets a hard ceiling on how much detail you can ever recover.
What Sharpening Can and Cannot Do
Sharpening enhances detail that exists in the data, even if it is faint and blurred. It cannot create detail the atmosphere never let reach your sensor. If poor seeing smeared a star into a fat blob across several pixels, no tool recovers the pinpoint that was never recorded — it can only redistribute contrast around the blur, and pushed too far that becomes ringing and artifacts.
So the honest framing is recovery, not invention. The detail ceiling is set at capture by aperture, focus, tracking, and above all seeing. From my Nordic site, targets often ride low through unsteady air, and on those nights aggressive sharpening just amplifies the atmospheric mush. On a rare night of steady seeing the same gear and the same routine yield detail that sharpening can genuinely bring out. The tool is the last few percent; the data is everything else.
Deconvolution: The Heavyweight
Deconvolution is the real detail-recovery process. It models the blur in your image as a point-spread function (PSF) — literally the shape a point source like a star was smeared into — and mathematically reverses it, sharpening structure that genuine blur softened. Done right, it tightens stars and sharpens fine detail in a way cosmetic methods cannot match.
It is also the fussiest step in the whole pipeline, and it has strict requirements. Deconvolution must run on linear data, before stretching, because the math assumes the linear relationship between pixel values and light. It needs a good PSF, usually derived from real stars in the image. And it almost always needs masking and careful iteration, because run unconstrained it generates dark rings around stars and amplifies noise into a mottled mess. I run deconvolution on a star mask, with a separate background protection, and few iterations — it is powerful precisely because it is easy to overdo. This is one area where PixInsight’s depth shows; the PixInsight vs Siril comparison covers how the two handle it.
Cosmetic Sharpening After the Stretch
The lighter family — wavelet sharpening, multiscale processing, high-pass and unsharp-mask methods — runs after stretching and works by boosting local contrast at chosen detail scales. It does not recover resolution the way deconvolution does, but it makes the structure already present read more crisply, which is often exactly what a finished image needs. Multiscale tools are especially useful because they let you sharpen mid-scale nebula filaments without hammering fine-scale noise.
The trap is the same one that haunts noise reduction in reverse. Push cosmetic sharpening too hard and you get harsh edges, bright-and-dark ringing around stars, and amplified background noise masquerading as detail. The fix is to sharpen on a mask that targets the structure and protects the smooth background and the stars, and to work at modest strength. Sharpening and noise reduction are partners: smooth the background, sharpen the structure, and keep each off the other’s territory with masks — the noise reduction guide covers the masking that makes both safe.
Deconvolution vs Cosmetic Sharpening
The two are not interchangeable — they do different jobs at different stages. Here is how they compare so you can place each correctly:
| Aspect | Deconvolution | Cosmetic sharpening |
|---|---|---|
| What it does | Reverses measured blur, recovers resolution | Boosts local contrast on existing detail |
| Image state | Linear (before stretch) | Nonlinear (after stretch) |
| Needs a PSF? | Yes, usually from stars | No |
| Main risk | Dark rings, amplified noise | Edge halos, fake detail |
| Difficulty | High, needs masking and iteration | Moderate |
| Best for | Tightening stars, real detail recovery | Final crispness on structure |
A typical strong workflow uses both: deconvolution on the linear data to tighten stars and recover what blur softened, then light cosmetic sharpening after the stretch to give the finished structure its final crispness. You do not have to use deconvolution — many fine images skip it — but cosmetic sharpening at the end is nearly universal.
Sharpening Different Targets
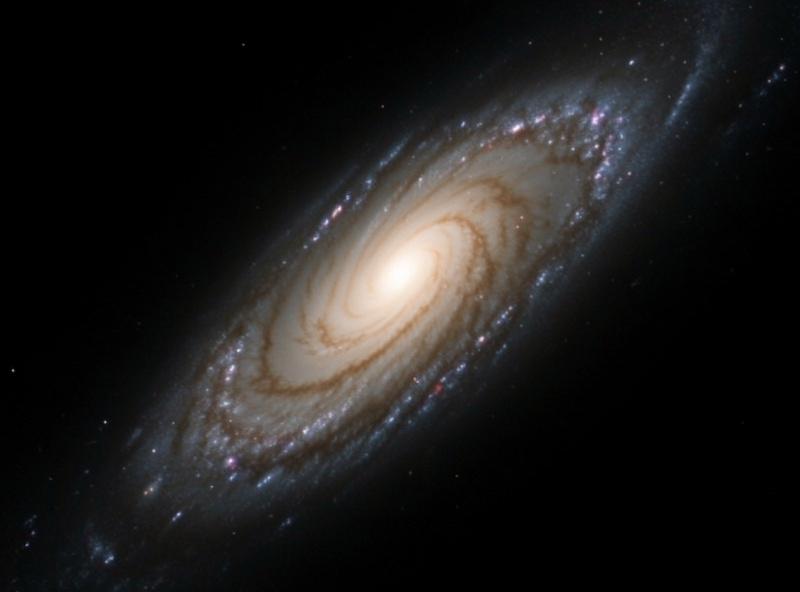
Not every target wants the same hand. Galaxies reward sharpening because their structure — spiral arms, dust lanes, the bright core — is exactly the kind of mid-scale detail that local-contrast tools enhance well; I lean into deconvolution to tighten the core and arms, then a light cosmetic pass to define the dust lanes. Bright emission nebulae like the Orion complex carry fine filamentary structure that multiscale sharpening brings out, but they also have huge smooth regions that punish any heavy hand, so the mask matters even more.
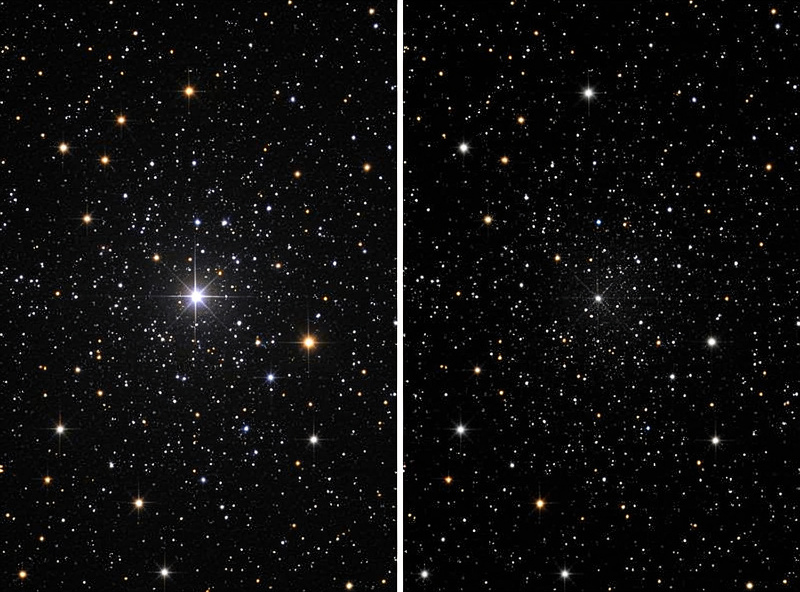
Faint galaxies and dim nebulae are the trap. Their structure sits close to the noise floor, so sharpening them often just amplifies grain into fake detail — here, more integration time does more than any tool, and a featherweight touch beats an aggressive one. Star clusters barely need sharpening at all; what they need is clean, round, well-controlled stars, which is an acquisition and deconvolution question more than a cosmetic-sharpening one. Reading the target before reaching for the slider is half the skill.
Common Sharpening Mistakes
A handful of errors account for nearly every over-cooked image. Sharpening globally instead of on a mask, so the background turns grainy and stars ring. Running deconvolution on stretched data, where the math no longer holds and you get rings and mottling. Judging at fit-to-screen, which hides the damage until someone else views the image at full size. Sharpening to compensate for a soft data set — poor focus, bad seeing, or trailed stars — which only amplifies the underlying problem. And the broad one: treating sharpening as a strength contest rather than a restraint exercise.
The cure for all of them is the same discipline I bring to every bench in the hobby, from the imaging rig to the hydroponics tent — resist the urge to optimize the one knob in front of you and respect the whole system. A gentle sharpen on clean, well-integrated, properly-ordered data beats a heavy sharpen on thin data every time.
Mask, and Always Judge at 100%
Whichever method you use, masking is what separates sharpening from damage. Stars must be protected or they grow dark rings and harsh edges; the smooth background must be protected or sharpening turns it grainy. I build a mask that exposes the structure I want crisper — spiral arms, dust lanes, nebula filaments — and shields everything else, then sharpen through it at modest strength.
And judge the result at 100% zoom, never fit-to-screen. A downsampled preview hides both under- and over-sharpening; at full resolution you see the truth — whether stars are clean, whether edges are ringing, whether the background is staying smooth. Over-sharpening is one of the most common reasons a technically good data set ends up looking artificial, and it is almost always invisible until you zoom in.
Where Sharpening Sits, and Star Reduction
In the full pipeline, deconvolution lives early — on linear data, right alongside gradient removal and color calibration, before the stretch. Cosmetic sharpening lives near the end, after stretching and after the bulk of noise reduction, as one of the last steps before final color and contrast tuning. Reverse them and you sharpen noise or break the linear assumption deconvolution depends on.
A related finishing move is star reduction. After sharpening, stars can dominate a star-rich field and bury the nebula or galaxy you came for. Modern star-removal and star-reduction tools let you process the starless structure and the stars separately, then recombine with the stars dialed back — a gentler, more natural look than the old trick of shrinking every star. It pairs naturally with sharpening because both are about directing the eye to the real subject. If your stars are misshapen before you even start — elongated or coma-flared at the edges — that is an optics or tilt problem no sharpening fixes; the field flattener and coma corrector guide covers getting round stars at capture.
The bottom line: sharpening is the last few percent, and it only ever enhances detail your data already holds. Collect clean frames as covered in the stacking guide, process them in order, then sharpen gently on a mask at 100% zoom. Restraint is the whole skill — the goal is an image that looks sharp and natural, not one that announces it was sharpened.