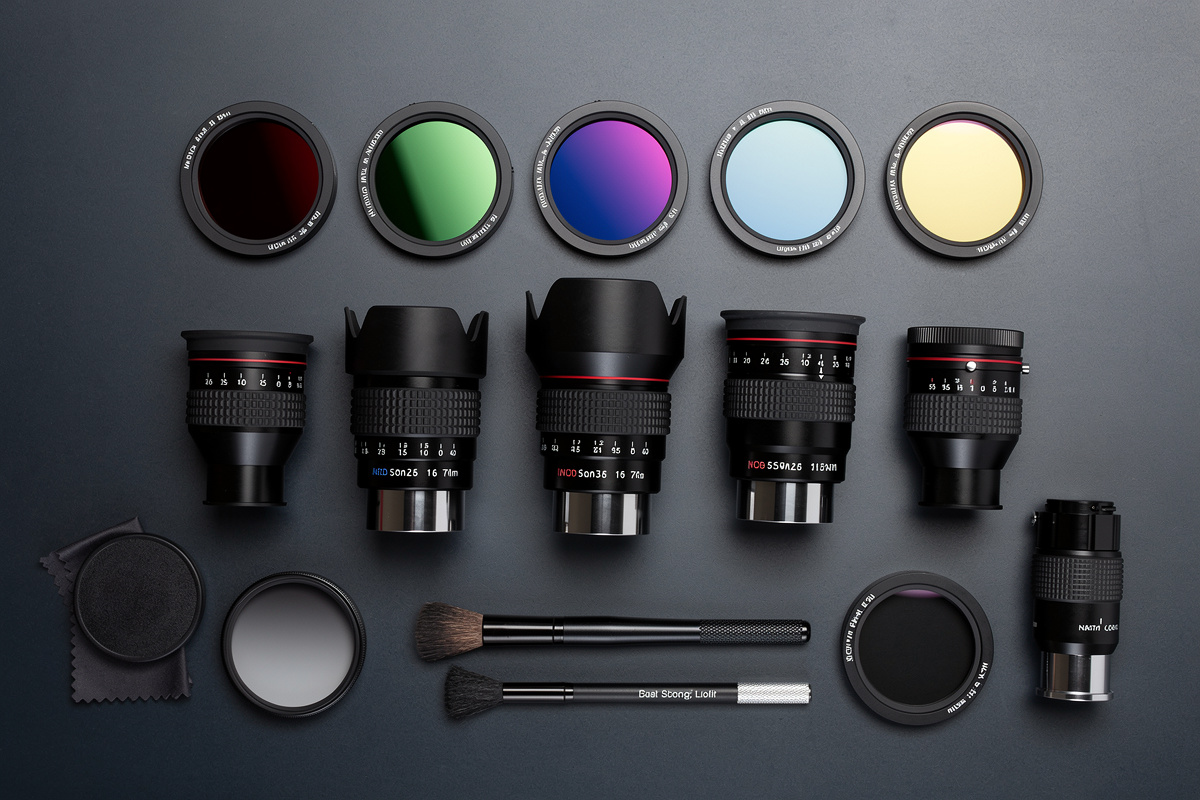
The right telescope accessories transform a basic instrument into a versatile observing system. Eyepieces alone can double or triple your telescope’s useful magnification range, while light pollution filters restore contrast in suburban skies. Most beginners spend their entire budget on the telescope itself and discover within weeks that accessories determine what they can actually see.
This guide covers every major accessory category — from essential first purchases to advanced upgrades — with specific product recommendations, compatibility notes by telescope type, and a budget allocation framework. Whether you bought your first scope last month or you have been observing for years, understanding the accessory ecosystem prevents wasted money and missed views.
Why Telescope Accessories Matter More Than the Telescope Itself
A $300 telescope with quality eyepieces and a proper finder will outperform a $600 telescope with stock accessories every time. The telescope is the light-gathering engine, but accessories control how that light reaches your eye, how accurately you point the scope, and how comfortable your observing sessions feel over hours at the eyepiece.
Manufacturers cut costs on included accessories because the telescope tube is the headline specification that sells units. Stock eyepieces are often basic Kellner designs with narrow apparent fields. Included finders may be hard to align and harder to use. Diagonals on refractors might introduce chromatic aberration that the optics themselves could avoid. Upgrading accessories fixes these compromises without replacing the telescope.
The practical impact is measurable. A quality 68-degree wide-angle eyepiece shows 40 percent more sky area than a standard 50-degree Plössl at the same magnification. A UHC filter reveals the Orion Nebula from a suburban backyard where no filter shows anything. A properly aligned red dot finder gets you on target in seconds instead of minutes spent star-hopping through a dim 6×30 finderscope.
Essential Accessories You Need on Day One
Three accessories are non-negotiable from the first night: a quality low-power eyepiece for finding objects, a collimation tool if you own a reflector, and a red dot or reflex finder. Everything else can wait, but these three determine whether your first session is frustrating or rewarding.
A 25mm or 32mm Plössl eyepiece provides the low magnification, wide field needed to locate objects and frame extended targets like the Pleiades and Andromeda Galaxy. Most stock eyepieces top out at 10mm or 25mm with mediocre eye relief. A $35 25mm Plössl with 52-degree apparent field is the single highest-impact upgrade for any starter telescope.
Reflector owners must collimate their mirrors before every serious session. A $25 Cheshire eyepiece or $35 laser collimator takes two minutes and turns blurry stars into sharp pinpoint views. Uncollimated reflectors are the number one reason beginners think their telescope is broken. If you own a Dobsonian or any Newtonian, collimation tools are as essential as the telescope itself.
Nice-to-Have Accessories That Improve Your Experience
After the essentials, a Barlow lens, a light pollution filter, and an adjustable observing chair form the second tier of high-value upgrades. Each solves a specific problem without requiring a large investment.
A 2x Barlow lens effectively doubles your eyepiece collection. That 25mm Plössl becomes a 12.5mm equivalent. Your 10mm becomes a 5mm for planetary detail. A quality 2x Barlow costs $30 to $60 and provides more magnification flexibility than buying two additional eyepieces. The caveat is that cheap Barlows introduce chromatic aberration, so spending slightly more pays off.
A broadband light pollution filter or UHC filter recovers 30 to 50 percent of the contrast lost to urban skyglow on emission nebulae. These filters work by passing only the specific wavelengths emitted by hydrogen and oxygen in nebulae while blocking mercury and sodium streetlight wavelengths. From a Bortle 7 suburban sky, a UHC filter makes the difference between seeing the Lagoon Nebula and seeing nothing.
Accessory Compatibility by Telescope Type
Not every accessory works with every telescope. Refractors, reflectors, and compound scopes have different optical paths, focusers, and needs. Buying accessories without checking compatibility wastes money and creates frustration.
Refractors use 1.25-inch or 2-inch focusers and accept any standard eyepiece, filter, or diagonal. Their closed tube means no collimation tools are needed. The main compatibility concern is the focuser size: budget refractors often have 1.25-inch-only focusers, which limits you to 1.25-inch eyepieces and filters unless you add a 2-inch adapter.
Reflectors (Newtonians and Dobs) use open tubes that require collimation and have no diagonal — light exits from the side of the tube through a focuser. All eyepieces and filters fit, but Barlow lens quality matters more in reflectors because they tend to have faster focal ratios (f/5 to f/6) where optical aberrations in cheap Barlows are more visible.
SCTs and Maksutovs use rear-cell threads (typically SCT thread or T-thread) for accessories. Camera adapters, off-axis guiders, and focal reducers thread directly onto the rear cell. Eyepieces go through the standard 1.25-inch or 2-inch visual back. The main compatibility issue is back-focus distance — adding too many accessories between the rear cell and eyepiece can push the focal point beyond the focuser’s travel range.
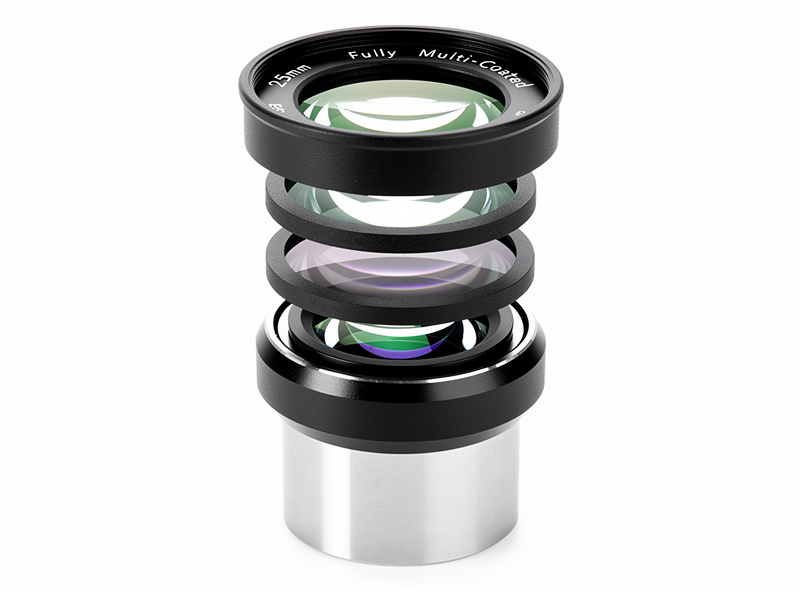
Understanding Telescope Eyepieces
Eyepieces are the most impactful accessory because they determine apparent field of view, eye relief, edge sharpness, and useful magnification range. The three dominant designs — Kellner, Plössl, and wide-angle — serve different purposes and price points.
Kellner eyepieces (often branded as “SR” or “MA” in budget scopes) use three elements in two groups. They provide acceptable center sharpness but suffer from edge distortion, short eye relief at shorter focal lengths, and a narrow 40-to-50-degree apparent field. They are the cheapest eyepieces and work adequately at f/8 or slower focal ratios. Replace them first.
Plössl eyepieces use four elements in two symmetric groups and represent the quality floor for serious observing. They deliver sharp images across a 52-degree apparent field with good eye relief down to about 12mm focal length. Below 12mm, eye relief drops rapidly, making short focal length Plössls uncomfortable. A set of 25mm, 15mm, and 10mm Plössls covers most observing needs for $60 to $100 total.
Wide-angle eyepieces (68 to 82 degrees apparent field) provide an immersive “spacewalk” experience that makes finding and tracking objects dramatically easier. Designs like the Explore Scientific 68-degree or Baader Morpheus use six to eight elements with long eye relief even at short focal lengths. They cost $50 to $150 each but transform the observing experience. One quality wide-angle low-power eyepiece (24mm to 30mm) is the single best eyepiece upgrade for any telescope.
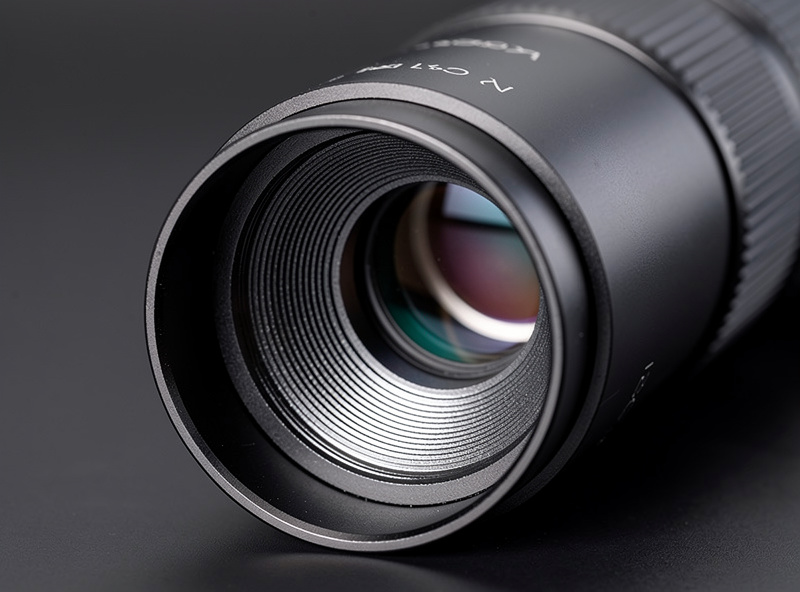
Telescope Filters: Light Pollution, Nebula, and Planetary
Filters screw onto the barrel of any 1.25-inch or 2-inch eyepiece and selectively transmit or block specific wavelengths of light. The right filter recovers contrast lost to light pollution, reveals faint nebulae invisible without filtering, and sharpens planetary detail by reducing atmospheric scatter.
Light pollution filters come in two categories: broadband and narrowband. Broadband filters (sometimes called “CLS” or “Sky-Glow”) block mercury and sodium emission lines while passing most other wavelengths. They provide a subtle improvement on all objects and work well for broadband targets like galaxies and star clusters. Narrowband filters (UHC and OIII) pass only the hydrogen-alpha and oxygen-III emission lines. They provide dramatic improvement on emission nebulae but darken everything else, including galaxies.
UHC (Ultra High Contrast) filters pass both hydrogen-alpha (656nm) and oxygen-III (496nm and 501nm) lines with a bandpass of about 25 to 30 nanometers. They are the best single filter for general nebula observing — they improve the Orion Nebula, Lagoon Nebula, Swan Nebula, and dozens of other emission targets. From suburban skies, a UHC filter is the most cost-effective upgrade after a quality eyepiece.
OIII filters pass only the two oxygen-III lines with an extremely narrow bandpass of about 11 nanometers. They produce a higher contrast view than UHC on objects that emit strongly in OIII, like the Veil Nebula and Helix Nebula. The tradeoff is that they dim stars significantly, making star-hopping harder. Buy a UHC first, then add OIII later.
Planetary filters are colored glass filters that enhance specific features by increasing contrast. A #80A light blue filter enhances Jupiter’s belts and Saturn’s ring detail. A #21 orange filter enhances Mars’s surface features during opposition. A #58 green filter enhances Jupiter’s Great Red Spot and Saturn’s atmospheric bands. They cost $10 to $25 each and provide noticeable improvement on nights of average seeing.
Telescope Mounts: Alt-Azimuth, Equatorial, and GoTo
The mount holds the telescope steady and allows smooth tracking of objects as they move across the sky. Mount choice affects every observing session because a shaky or hard-to-use mount ruins views regardless of optical quality.
Altitude-azimuth (alt-az) mounts move in two axes: up-down (altitude) and left-right (azimuth). They are intuitive to use — point and look — and are the standard mount for Dobsonian telescopes. Alt-az mounts are lightweight, require no polar alignment, and set up in seconds. The limitation is field rotation: objects drift out of the field at high magnification because alt-az mounts do not track the curved path objects follow across the sky.
Equatorial mounts align one axis with the celestial pole, allowing single-axis tracking to follow objects across the sky. Once polar aligned, turning one slow-motion knob keeps any object centered in the eyepiece. Equatorial mounts are essential for astrophotography and valuable for high-magnification planetary observing where even slight drift ruins the view. The tradeoff is setup complexity: polar alignment takes 5 to 15 minutes and requires some understanding of celestial coordinates.
GoTo mounts add computerized motors and a database of thousands of objects. After a star alignment procedure (typically 2 to 3 stars), the mount automatically slews to any object you select from the hand controller. GoTo mounts come in both alt-az and equatorial configurations. They cost $300 to $1,500 depending on payload capacity and accuracy. GoTo is most valuable for observers in light-polluted skies where star-hopping is difficult, and for astrophotographers who need precise tracking.
Barlow Lenses: Doubling Your Magnification Options
A Barlow lens sits between the focuser and eyepiece, increasing the telescope’s effective focal length. A 2x Barlow doubles magnification; a 3x Barlow triples it. This effectively doubles your eyepiece collection because each eyepiece produces two different magnifications — with and without the Barlow.
The key specification is optical quality at your telescope’s focal ratio. At f/10 (SCT), almost any Barlow works well. At f/5 (fast Newtonian), only multi-element achromatic Barlows maintain sharpness across the field. The $25 to $50 range includes excellent 2x options from brands like GSO, Apertura, and Celestron. Avoid no-name Barlows under $15 — they introduce lateral chromatic aberration that makes stars look like tiny rainbows.
Finder Scopes and Red Dot Sights
Every telescope needs a way to point at objects you cannot see with the naked eye. Finder options range from simple reflex sights to magnifying finderscopes, and the right choice depends on your telescope type and observing style.
Red dot finders and reflex sights (Telrad, Rigel QuikFinder, generic red dot) project a reticle onto a transparent window. You look through the window with both eyes open and place the dot on the target. Red dot finders are the best choice for Dobsonians and fast reflectors because they provide zero magnification, which means a wide field that matches star charts. They are also easier to align than magnifying finders because any slight error is proportionally smaller at zero magnification.
Magnifying finders (6×30, 8×50, 9×50) show a magnified, inverted view of the sky with crosshairs. They reveal fainter objects than red dot finders, which helps when star-hopping to very dim targets. The 8×50 and 9×50 finders gather enough light to show magnitude 9 or 10 stars, matching many objects in the Messier and NGC catalogs. The tradeoff is a narrower field, inverted image, and more complex alignment procedure.
Collimation Tools for Reflectors
Collimation is the process of aligning the primary and secondary mirrors in a Newtonian reflector so that light converges to a single focal point. Uncollimated reflectors produce elongated stars, soft images, and poor planetary detail. Every reflector owner must own a collimation tool and use it regularly.
A Cheshire eyepiece is the most reliable and affordable collimation tool. It costs $20 to $35 and uses a crosshair and reflective surface to center the secondary mirror under the focuser and align the primary mirror’s center spot. The process takes 2 to 3 minutes once learned. Cheshire eyepieces work in daylight and require no power, making them the standard recommendation for visual observers.
Laser collimators project a beam down the optical axis and show alignment on a target grid. They are faster than Cheshire eyepieces (under 60 seconds for experienced users) but require the laser itself to be collimated — a cheap laser collimator can be misaligned out of the box. Quality laser collimators from brands like HoTech or Glatter cost $50 to $80 and include self-centering mechanisms. Budget laser collimators under $30 should be checked for alignment before use.
Power Supplies and Dew Prevention
Electronic accessories — GoTo mounts, dew heaters, cooling fans — require portable power. Dew formation on corrector plates and secondary mirrors destroys image quality mid-session. Both problems have straightforward solutions that cost $30 to $100.
A 12V sealed lead-acid (SLA) battery in the 7Ah to 17Ah range powers a GoTo mount for 8 to 20 hours and costs $25 to $40. Lithium iron phosphate (LiFePO4) batteries weigh half as much and last 2,000 charge cycles but cost $80 to $150. Either type connects via a cigarette-lighter adapter cable that plugs into the mount’s power port. Avoid running a GoTo mount on alkaline batteries — voltage sag during slews causes alignment errors.
Dew shields are passive tubes that extend beyond the corrector plate or objective lens, slowing radiative cooling. A $15 to $25 flexible dew shield adds 1 to 2 hours before dew forms. Active dew heaters ($30 to $50 for a strip and controller) wrap around the corrector plate or secondary holder and provide enough heat to prevent dew indefinitely. A dew controller with multiple channels ($40 to $60) lets you adjust heat output to match conditions.
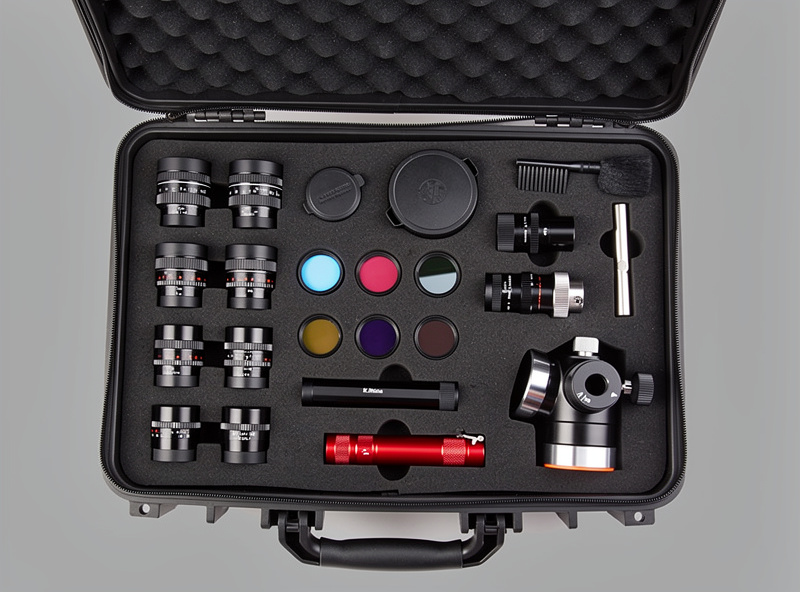
How to Allocate Your Accessory Budget
The optimal budget split depends on what came with your telescope, but a general framework prevents overspending on one category while neglecting others. The goal is a balanced system where every accessory earns its cost through improved views or convenience.
For a $300 to $500 telescope with stock accessories, allocate roughly: 35 percent to eyepieces (two quality Plössls or one wide-angle), 20 percent to a finder upgrade (red dot or Telrad), 20 percent to a Barlow lens, 15 percent to filters (UHC first), and 10 percent to collimation tools if you own a reflector. This $150 to $250 in accessories will outperform stock setups on telescopes costing twice as much.
For telescopes in the $500 to $1,500 range that already include decent eyepieces, shift budget toward mount improvements, premium filters, and specialized eyepieces for planetary or deep-sky use. A second 2-inch wide-angle eyepiece, a motorized EQ platform for a Dobsonian, and an OIII filter to complement your UHC provide the biggest visible improvements at this level.
Telescope Accessories Comparison Table
| Accessory | Priority | Price Range | Best For | Compatibility |
|---|---|---|---|---|
| 25mm Plössl Eyepiece | Essential | $25-$40 | All observing | All 1.25″ focusers |
| Red Dot Finder | Essential | $20-$45 | Object location | All telescopes with finder shoe |
| Cheshire Collimator | Essential (Reflectors) | $20-$35 | Optical alignment | Newtonian/Dobsonian only |
| 2x Barlow Lens | High | $30-$60 | Magnification flexibility | All 1.25″ focusers |
| UHC Filter | High | $40-$80 | Nebula contrast | All 1.25″ eyepieces |
| Wide-Angle Eyepiece (68°) | High | $50-$120 | Deep-sky framing | 1.25″ or 2″ focusers |
| OIII Filter | Medium | $50-$100 | Specific nebulae | All 1.25″ eyepieces |
| Planetary Filter Set | Medium | $25-$50 | Planetary detail | All 1.25″ eyepieces |
| Dew Heater + Controller | Medium | $50-$80 | Extended sessions | All telescopes |
| GoTo Mount | Optional | $300-$1,500 | Automated tracking | Varies by payload |
| Eyepiece Case | Optional | $15-$40 | Protection/storage | Universal |
| Observing Chair | Optional | $40-$120 | Comfort | Universal |
Related Articles
Best Telescopes for Beginners in 2026: Top Picks by Budget — Start with the right telescope before investing in accessories.
Telescope Buying Guide 2026: How to Choose Your First Telescope — Understand focal ratios and focuser sizes to ensure accessory compatibility.
Refractor vs Refractor Telescope: Which Design Is Right for You? — Different telescope designs need different accessories.
Astrophotography Guide: Equipment, Settings, and Techniques — Camera adapters and tracking mounts for imaging.
Astronomy for Beginners: Your Complete Guide to Stargazing — Learn what to observe before buying more gear.
What telescope accessories should I buy first?
Buy a quality 25mm Plössl eyepiece, a red dot finder, and a collimation tool if you own a reflector. These three accessories cost under $100 total and have the largest immediate impact on observing quality compared to any other purchase.
Do light pollution filters really work?
Yes. UHC filters improve nebula contrast by 30 to 50 percent under suburban skies by blocking mercury and sodium streetlight wavelengths. They do not help with galaxies or star clusters, but on emission nebulae like the Orion Nebula the difference is dramatic.
Is a Barlow lens worth buying?
A 2x Barlow lens effectively doubles your eyepiece collection for $30 to $60. A 25mm eyepiece becomes a 12.5mm equivalent and a 10mm becomes a 5mm. Quality Barlows from GSO or Celestron add minimal aberration at f/8 or slower.
What size eyepieces do I need for a telescope?
Start with three focal lengths: 25mm to 32mm for low power and finding objects, 12mm to 15mm for general deep-sky viewing, and 6mm to 10mm for planets and close doubles. A 2x Barlow fills the gaps between these without buying more eyepieces.
Do I need a GoTo mount for visual observing?
No. GoTo mounts help most in light-polluted skies where star-hopping is difficult, but a Dobsonian with a Telrad finder and printed star charts reaches the same objects for a fraction of the cost. GoTo becomes essential for astrophotography where precise tracking is required.
How often should I collimate a reflector telescope?
Collimate before every serious observing session and after transporting the telescope. The process takes 2 to 3 minutes with a Cheshire eyepiece. Reflector mirrors shift during transport and temperature changes, and even slight misalignment degrades image quality noticeably at high magnification.