How to Start Stargazing Tonight
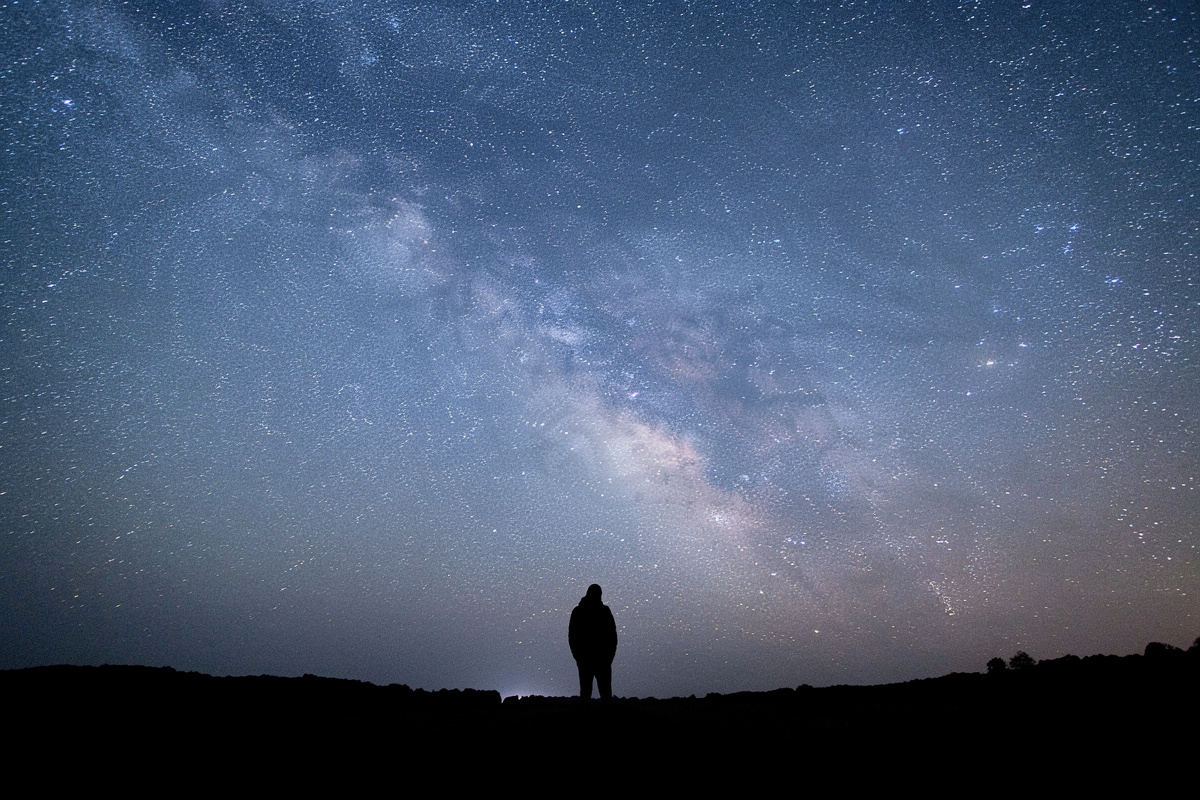
You do not need a telescope, a degree, or a dark mountain to start stargazing. The entire hobby begins with walking outside on a clear night, letting your eyes adjust for 20 minutes, and looking up. Within one hour you will recognize at least three constellations and notice that the brightest points of light do not twinkle the same way stars do — those are planets.
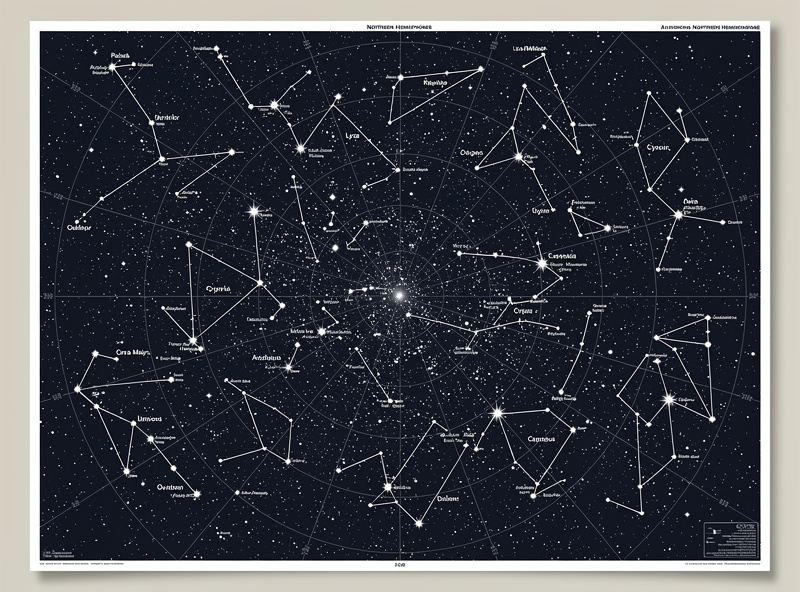
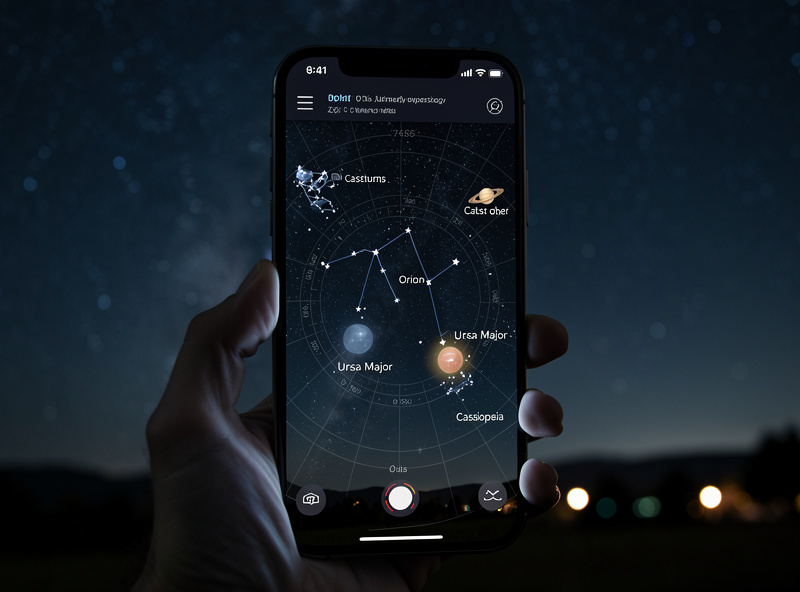
Start by downloading a free star chart app like Stellarium Mobile or SkySafari. Point your phone at any section of sky and the app labels what you see in real time. Use the app to learn five anchor stars: Polaris (north), Vega, Sirius, Betelgeuse, and Arcturus. Once you can find these five without a phone, you have the foundation to navigate the entire night sky with a paper planisphere — a $10 rotating star chart that works without batteries, screen glare, or dark-adaptation-ruining white light.
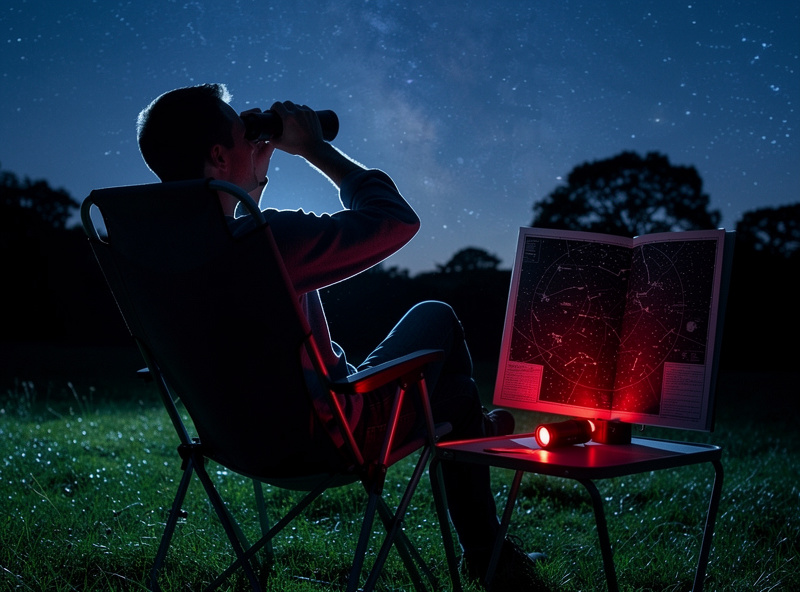
The single most important rule for beginners: protect your dark adaptation. Your eyes take 20-30 minutes to fully dilate and develop maximum sensitivity to faint starlight. One glance at a phone screen resets the clock. Use a red flashlight (or tape red cellophane over a white flashlight) to read charts and adjust equipment. This one habit separates frustrated beginners from those who see the Milky Way on their first night.
Naked Eye vs Binoculars vs Telescope
Each observation method serves a different purpose in learning astronomy, and skipping straight to a telescope without spending time with the naked eye and binoculars is a common beginner mistake. The following table compares all three methods.
| Feature | Naked Eye | Binoculars (10×50) | Telescope (8″ Dobsonian) |
|---|---|---|---|
| Setup time | 0 minutes | 0 minutes | 10-15 minutes |
| Portability | Always available | Fits in a jacket pocket | Requires vehicle for transport |
| Field of view | ~180 degrees | 6-7 degrees | 0.5-1.5 degrees |
| Magnitude limit | +6.0 | +9.5 | +14.0 |
| Best for | Constellations, meteor showers, star-hopping practice | Star clusters, bright nebulae, the Moon, scanning large areas | Planets, galaxies, planetary nebulae, detailed lunar craters |
| Cost | Free | $80-$150 | $480-$550 |
| Learning curve | Low — learn constellations first | Low — point and look | Moderate — learn to find objects and collimate mirrors |
Spend your first month stargazing naked eye only. Learn the major constellations visible that season. Then add binoculars — 10×50 porro-prism binoculars from Nikon, Celestron, or Olympus in the $80-$150 range are the standard recommendation. Binoculars show you open star clusters like the Pleiades and the Double Cluster, the four Galilean moons of Jupiter, and the Andromeda Galaxy as a faint fuzzy oval. After 2-3 months with binoculars, you will know exactly what you want to see in more detail, and that knowledge guides your telescope purchase. For a current shortlist of binoculars that perform well under dark skies without overshooting a beginner budget, the best binoculars for astronomy guide picks the top options by price tier.
Understanding the Night Sky: Constellations and Star Maps
The night sky is divided into 88 official constellations recognized by the International Astronomical Union. You do not need to learn all 88 — 15-20 constellations visible from your latitude provide enough anchor points to navigate to any object in the sky using a technique called star-hopping.
Start with the circumpolar constellations — those that never set from your latitude. In the Northern Hemisphere, Ursa Major (the Big Dipper), Cassiopeia, and Draco are always visible. Use the two pointer stars in the Big Dipper’s bowl to find Polaris, which marks the north celestial pole. From Polaris, star-hop outward to every other constellation using your planisphere.
Seasonal constellations rotate through the sky as Earth orbits the Sun. Orion dominates winter skies in the Northern Hemisphere. Leo follows in spring. The Summer Triangle (Vega, Deneb, Altair) anchors summer nights. Andromeda and Pegasus rise in autumn. Learning one new constellation per week puts you ahead of most amateur astronomers within a year.
Star-hopping technique: Star-hopping is the method of navigating from a bright, known star to a fainter target by moving in a specific direction for a measured distance. Example: to find the Andromeda Galaxy (M31), start at the W-shaped constellation Cassiopeia, locate the star Schedar, then hop two degrees east and one degree south to reach the galaxy’s position. Each constellation in your star atlas lists nearby deep-sky objects with precise hop instructions. After 10-15 successful star-hops, the process becomes intuitive and you stop needing the atlas for common targets. This skill transfers directly to telescope use — star-hopping with a finderscope uses the same directional logic as naked-eye constellation navigation.
The Moon: Your First Telescope Target
The Moon is the best first target for any new telescope. It is bright enough to find instantly, detailed enough to fill hours of observation, and changes appearance nightly as its phase progresses. A 4-inch telescope at 100x magnification reveals hundreds of individual craters, mountain ranges, and dark lava plains (maria) across the lunar surface.
The most dramatic views occur along the terminator — the boundary between the illuminated and dark portions of the disk. Along the terminator, craters cast long shadows that reveal their depth and rim height in three-dimensional relief. At first quarter (when the terminator crosses the center of the disk), the craters Copernicus, Eratosthenes, and Plato show stunning shadow detail. At last quarter, the craters Tycho, Clavius, and the Straight Wall are highlighted.
Avoid observing the Moon at full phase. Full Moon illuminates the surface from directly overhead, eliminating all shadows and producing a flat, washed-out disk with almost no visible relief. The best lunar observing occurs during the waxing and waning phases when the terminator provides contrast. Moon filters that reduce brightness (neutral density filters costing $10-$20) help with eyepiece comfort but are not required — the Moon cannot damage your eyes or your telescope at any brightness.
Meteor Showers: No Telescope Required
Meteor showers are pure naked-eye events — telescopes and binoculars are useless because meteors streak across the entire sky too fast to track with magnified optics. Meteor showers occur when Earth passes through the debris trail left by a comet, and tiny dust particles burn up in the atmosphere at 40-70 miles altitude, producing brief streaks of light.
The three best meteor showers for Northern Hemisphere observers are the Quadrantids (peaking January 3-4, 120 meteors per hour), the Perseids (peaking August 12-13, 100 per hour), and the Geminids (peaking December 13-14, 150 per hour). The Geminids are the most reliable — consistent rates year after year with bright, slow-moving fireballs. The Perseids benefit from warm summer weather and coincide with school vacations, making them the most popular shower.
For the best meteor-watching experience, lie on a reclining chair or blanket and look straight up — this maximizes your visible sky area. Do not focus on the constellation where the meteors appear to radiate from (the radiant); meteors visible near the radiant produce short trails. Meteors 40-90 degrees away from the radiant produce the longest, most spectacular streaks. Give your eyes 20 minutes to dark-adapt before counting, and expect rates to build slowly as the radiant rises higher in the sky after midnight.
Seasonal Sky Guide: What to Look For Each Month
The night sky changes throughout the year as Earth’s position in its orbit faces different regions of the Milky Way. Here is what to observe in each season.
Winter (December-February): Orion the Hunter dominates the southern sky. Below Orion’s belt lies the Orion Nebula (M42), visible as a fuzzy star to the naked eye and a breathtaking cloud of gas through binoculars. The Pleiades (M45) cluster high overhead. Sirius, the brightest star in the night sky, sparkles low in the south. Jupiter is at opposition in January during most years, making it the best time for planetary observation.
Spring (March-May): Leo the Lion climbs high, with the bright star Regulus at its base. The Big Dipper is directly overhead, making star-hopping easy. This is galaxy season — the Virgo Cluster of galaxies sits between Leo and the bright star Spica in Virgo. Under dark skies, a modest telescope reveals dozens of faint elliptical and spiral galaxies in this region.
Summer (June-August): The Milky Way arches overhead from Sagittarius in the south to Cassiopeia in the north. This is the richest region of the sky for deep-sky objects: the Lagoon Nebula, the Trifid Nebula, the Swan Nebula, and the star clouds of Sagittarius. The Summer Triangle (Vega, Deneb, Altair) provides easy navigation. The Perseid meteor shower peaks around August 12.
Autumn (September-November): The Great Square of Pegasus rises in the east, with the Andromeda Galaxy (M31) visible nearby — at 2.5 million light-years away, it is the most distant object visible to the naked eye. The Double Cluster in Perseus is a binocular showpiece. Saturn reaches opposition in autumn most years, making its rings visible at their best angle.
Essential Equipment for Stargazing
The equipment hierarchy for beginners follows a specific order: comfort first, navigation second, magnification third. Most beginners buy a telescope first and discover they cannot find anything with it, their back hurts from bending over a short tripod, and they never bothered to learn the constellations that would let them point at an object in the first place.
Comfort items (buy first): A reclining lawn chair or zero-gravity lounger ($30-$60) lets you observe the overhead sky without neck strain. A red flashlight ($8) preserves your dark adaptation. Warm layers and hand warmers ($15) extend your observing sessions from 20 minutes to 2 hours in cool weather. A thermos of hot coffee costs $15 and is worth more to your astronomy career than any eyepiece.
Navigation tools: A planisphere ($10) matched to your latitude shows what is visible on any date and time. A free app (Stellarium) provides real-time labels. Eventually, a detailed star atlas like the Pocket Sky Atlas ($25) or Uranometria 2000 ($50) becomes essential for finding faint objects.
Optical equipment: Binoculars ($80-$150) come before a telescope. After 2-3 months with binoculars, read our best telescopes for beginners guide and our telescope buying guide to choose the right scope for your goals and budget.
Organization and logging: A simple observing log (a $5 notebook works) records what you saw, when, where, and through what equipment. Logging builds a personal reference that accelerates your learning — after six months you will have a database of your own observations that reveals which objects look best under specific conditions and through which eyepieces. Many serious amateurs maintain logs spanning decades.
Common Beginner Mistakes to Avoid
Every astronomer makes these mistakes early on. Knowing them in advance saves you frustration, money, and clear nights wasted on the wrong priorities.
Mistake 1: Buying a telescope before learning the sky. A $500 telescope that sits in the closet because you cannot find anything with it delivers zero value. Spend your first 2-3 months with naked eye and binoculars learning constellations. When you can find five Messier objects with binoculars, you are ready for a telescope.
Mistake 2: Obsessing over magnification. High magnification shows a small, dim, shaky image of most objects. The best views of nebulae, star clusters, and galaxies come at low to moderate magnification (40x-120x) where the widest possible field of view captures the entire object. Reserve 200x+ for the Moon, planets, and tight double stars.
Mistake 3: Observing only in the first hour after dark. Atmospheric turbulence (called “seeing” by astronomers) is worst in the first 2-3 hours after sunset while the ground releases absorbed daytime heat. The best planetary and deep-sky views occur after 10 PM when the atmosphere stabilizes. If you observe only from 8-9 PM, you are looking through the worst conditions of the night.
Mistake 4: Not cooling your telescope. A mirror stored indoors at 70 degrees F placed outside at 40 degrees F needs 30-45 minutes to reach thermal equilibrium. Observing through a warm mirror produces turbulent, blurry images caused by convection currents inside the tube. Set your telescope outside with the dust cap off 45 minutes before you plan to observe. This single step improves image quality more than upgrading your eyepieces.
Mistake 5: Giving up on cloudy nights. Cloudy nights are preparation nights. Collimate your mirrors, organize your eyepieces, study star charts for your next target list, clean your optics (sparingly — primary mirrors need cleaning only once or twice per year), and read about the objects you want to observe. The astronomers who see the most on clear nights are the ones who prepared during cloudy ones.
Dealing with Light Pollution
Over 80% of North Americans live under light-polluted skies where the Milky Way is invisible. Light pollution does not mean you cannot do astronomy — it means your targets change. The Moon, planets, bright double stars, and the brightest deep-sky objects (M31, M42, M45, M13) are visible even from city centers because their surface brightness overcomes the background sky glow.
Three strategies help suburban astronomers see more: first, observe from your backyard during evenings when the Moon is below the horizon and local lights are off (ask neighbors to turn off landscape lighting — most will happily comply for 30 minutes). Second, use a light pollution filter screwed onto your eyepiece — an Orion SkyGlow broadband filter ($50) or a UHC filter ($60) cuts sodium and mercury vapor light wavelengths and increases contrast on nebulae. Third, drive to a darker site. See our dark sky locations guide to find the nearest Bortle 4 or darker zone within a few hours of major cities.
The Bortle scale rates sky darkness from 1 (pristine dark) to 9 (inner-city whiteout). A Bortle 5 suburban sky shows the Milky Way faintly in summer. A Bortle 3 rural sky shows it clearly. A Bortle 2 sky reveals zodiacal light, the Gegenschein, and airglow. The difference between Bortle 7 and Bortle 4 is equivalent to upgrading from a 4-inch to a 12-inch telescope in terms of the number of objects visible.
Joining Star Parties and Astronomy Clubs
Star parties are organized events where astronomers set up telescopes at dark sites and invite the public (or fellow members) to observe through them. Attending a star party is the single best way to learn what different telescopes show before you buy one. You will look through 6-inch refractors, 16-inch Dobsonians, and dedicated astrophotography rigs — all in one night.
The major annual star parties in North America include the Texas Star Ranger Fest (March), the Oregon Star Party (August), the Okie-Tex Star Party (September), and the Winter Star Party in Florida (February). Local astronomy clubs host monthly star parties at dark sites year-round — find your nearest club through the Astronomical League’s directory at astroleague.org.
Most clubs welcome beginners warmly. Dues are typically $20-$40 per year, and membership often includes access to club-owned loaner telescopes, dark sky observing sites with red-light policies, and mentorship from experienced observers. Many clubs run telescope workshops where you can learn collimation, astrophotography setup, and constellation identification in person.
Frequently Asked Questions
What do I need to start stargazing?
You need a clear night, 20 minutes for your eyes to dark-adapt, and a red flashlight to read a free star chart app like Stellarium. A reclining chair and warm clothes extend your session. A telescope is optional for the first several months — naked eye and binoculars come first.
Can I stargaze from a city?
Yes. The Moon, Jupiter, Saturn, Mars, Venus, bright star clusters, and the brightest nebulae are visible from city centers. Light pollution filters improve contrast on nebulae. The Milky Way and faint galaxies require a Bortle 4 or darker sky, usually 60-90 minutes from major cities.
What are the best constellations to learn first?
Learn Ursa Major (the Big Dipper), Orion, Cassiopeia, Leo, and Cygnus first. These five constellations are visible across most of the year from mid-northern latitudes and provide anchor points for star-hopping to every other constellation and deep-sky object.
Do I need a telescope to enjoy astronomy?
No. Many experienced astronomers spend years with binoculars or naked-eye observation before purchasing a telescope. Binoculars reveal hundreds of star clusters, bright nebulae, and the Galilean moons of Jupiter. Naked-eye observing teaches constellation navigation that makes telescope use far more productive.
What is the best time of night to stargaze?
The best stargazing occurs between 10 PM and 3 AM when atmospheric turbulence (seeing) stabilizes, most ground heat has radiated away, and astronomical twilight gives way to full darkness. Planets and the Moon can be observed at any time after dark.
How do I find dark skies near me?
Use lightpollutionmap.info to see a color-coded map of sky brightness in your area. Green zones are Bortle 4, yellow zones are Bortle 5-6, and gray zones are Bortle 7+. DarkSky.org maintains a directory of International Dark Sky Parks where lighting is managed for astronomy.