Astrophotography cameras fall into three categories: DSLR and mirrorless cameras ($300-2,000), cooled dedicated astronomy cameras ($500-5,000), and planetary cameras ($150-800). Each category serves different targets, budgets, and experience levels, and choosing the right camera type is more important than choosing the right specific model.
The camera is the third most important component in an astrophotography chain — behind the mount and telescope — but it is the component that generates the most confusion among beginners because marketing emphasizes megapixels and resolution when sensor sensitivity, read noise, and thermal characteristics matter far more for astrophotography than pixel count. My own camera path went from a stock Canon EOS Rebel T6i (worked fine for the Milky Way and clusters), to an astro-modified Canon T7i (transformed M42 and M8), to a ZWO ASI533MC Pro on the cooled-camera side. Each step taught me what the previous camera could not show. The companion astrophotography equipment hub covers the full imaging chain context.
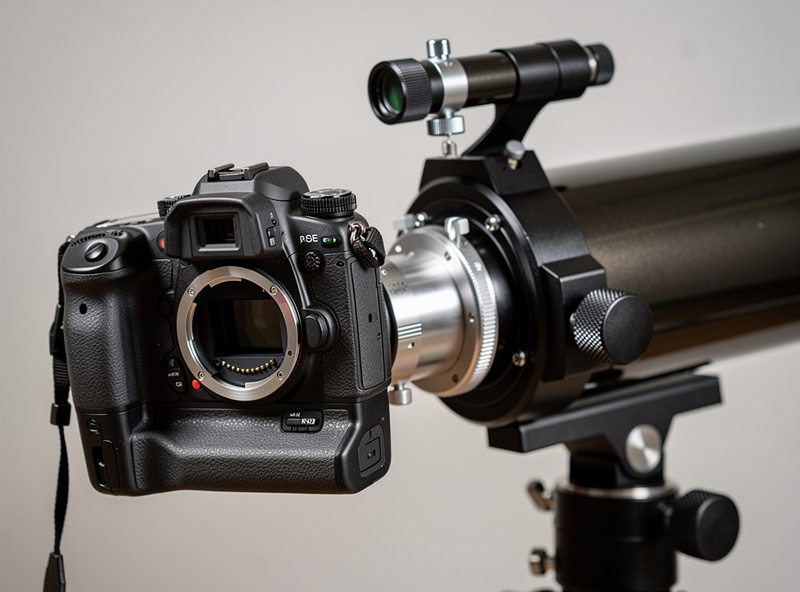
DSLR and Mirrorless Cameras for Astrophotography
DSLR and mirrorless cameras are the most accessible astrophotography cameras because they include a built-in screen, battery, storage, and familiar controls. Any camera that shoots manual exposures longer than 30 seconds and saves 14-bit raw files can capture deep sky images. Stock cameras work well for broadband targets — star clusters, galaxies, and wide-field Milky Way shots — but struggle with emission nebulae because their infrared blocking filters attenuate the critical hydrogen-alpha wavelength at 656nm.
Modified vs Stock DSLRs
Modifying a DSLR by replacing its infrared blocking filter with a clear or astronomically tuned filter increases hydrogen-alpha sensitivity by 3-5x. This modification transforms emission nebulae from faint, colorless patches into vivid, detailed structures. A Canon EOS Rebel T7i modified by a third-party service costs $400-600 total and captures nebulae that stock cameras costing twice as much cannot see.
Stock cameras remain excellent for beginners, Milky Way photography, star clusters, and broadband targets. The modification is worthwhile only if emission nebulae are your primary targets. Nikon, Canon, and Sony all produce good astrophotography cameras — the specific model matters less than having manual exposure control, raw file output, and good high-ISO noise performance. A star tracker mount paired with any of these bodies gives you a true beginner astrophotography platform under $1,000.
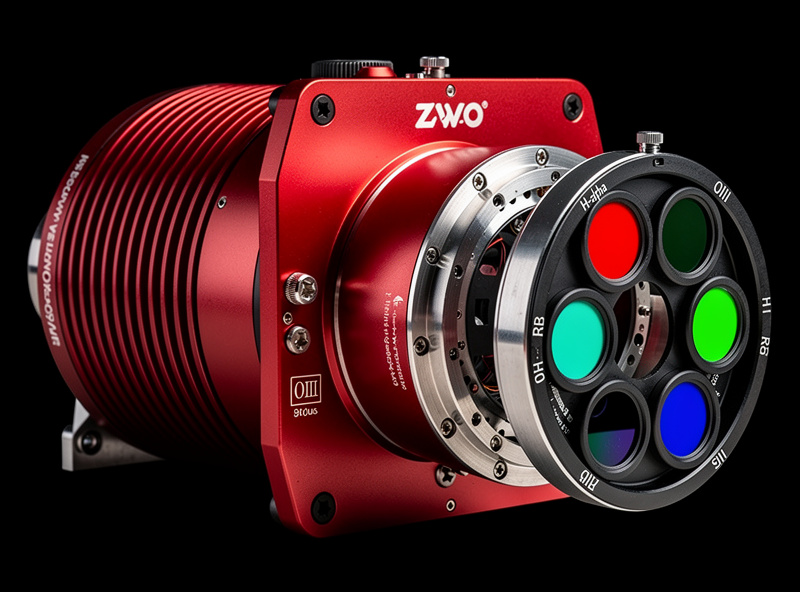
Cooled Dedicated Astronomy Cameras
Cooled cameras from ZWO, QHY, and Player One use thermoelectric cooling to reduce sensor temperature 30-40 degrees below ambient. This cooling dramatically reduces thermal noise — the random signal generated by heat in the sensor — enabling longer exposures and cleaner images, especially during warm summer nights. ZWO publishes a complete ASI533MC Pro datasheet with QE curves, read noise figures, and cooling delta specifications that make a clean comparison against DSLR sensor sheets straightforward.
One-Shot-Color (OSC) vs Monochrome
One-shot-color cameras capture red, green, and blue simultaneously through a Bayer matrix on the sensor. They are simpler to use and less expensive than monochrome setups because they require no filter wheel and produce color images in a single exposure. The ZWO ASI533MC Pro ($800) and ASI2600MC Pro ($1,500) are the most popular OSC cooled cameras.
Monochrome cameras capture light intensity without color information. Combined with a filter wheel holding red, green, blue, and narrowband filters, they capture each channel separately and combine them in processing. Monochrome setups cost 2-3x more than OSC (camera + filter wheel + filters) but produce higher signal-to-noise ratio images and eliminate Bayer matrix artifacts. For emission nebulae using narrowband filters (hydrogen-alpha, oxygen-III), monochrome cameras are strongly preferred because they use 100% of each pixel for each filter, while OSC cameras use only 25% of pixels for each color channel.
Popular Camera Models by Budget
| Camera | Type | Price | Sensor | Best For |
|---|---|---|---|---|
| ZWO ASI224MC | OSC cooled | $400 | 1/3 inch | Planetary, guiding, beginner DSO |
| ZWO ASI533MC Pro | OSC cooled | $800 | 1 inch square | Best beginner cooled camera |
| ZWO ASI585MC | OSC cooled | $600 | 1/1.2 inch | Budget DSO with low read noise |
| ZWO ASI2600MC Pro | OSC cooled | $1,500 | APS-C | Intermediate DSO, full frame field |
| ZWO ASI1600MM Pro | Mono cooled | $1,000 | 4/3 inch | Budget narrowband mono |
| ZWO ASI2600MM Pro | Mono cooled | $2,000 | APS-C | Advanced narrowband imaging |
| Canon EOS Ra | Mirrorless modified | $2,500 | Full frame | Wide-field broadband + H-alpha |
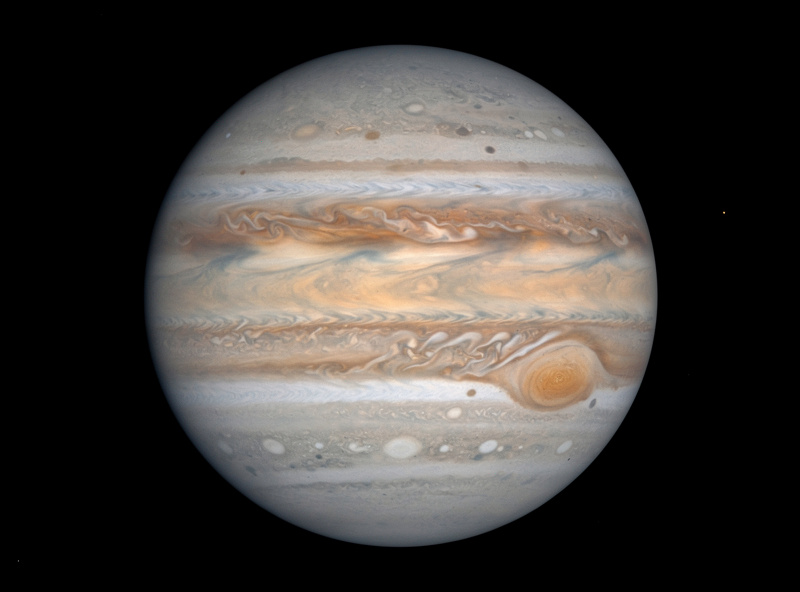
Planetary Cameras
Planetary cameras use small sensors with very small pixels (1.5-3.75 microns) and high frame rates (100-200 fps) to capture thousands of frames during planetary transits. Lucky imaging — selecting the sharpest 5-10% of frames — overcomes atmospheric seeing by capturing moments of stillness between turbulent periods.
The ZWO ASI224MC ($400) and ASI462MC ($350) are the most popular planetary cameras. Their small sensors match the small apparent size of planets (20-50 arcseconds) and their high sensitivity enables short exposures that freeze atmospheric turbulence. A 2x or 3x Barlow lens increases image scale to match the camera’s pixel size to the telescope’s resolving capability.
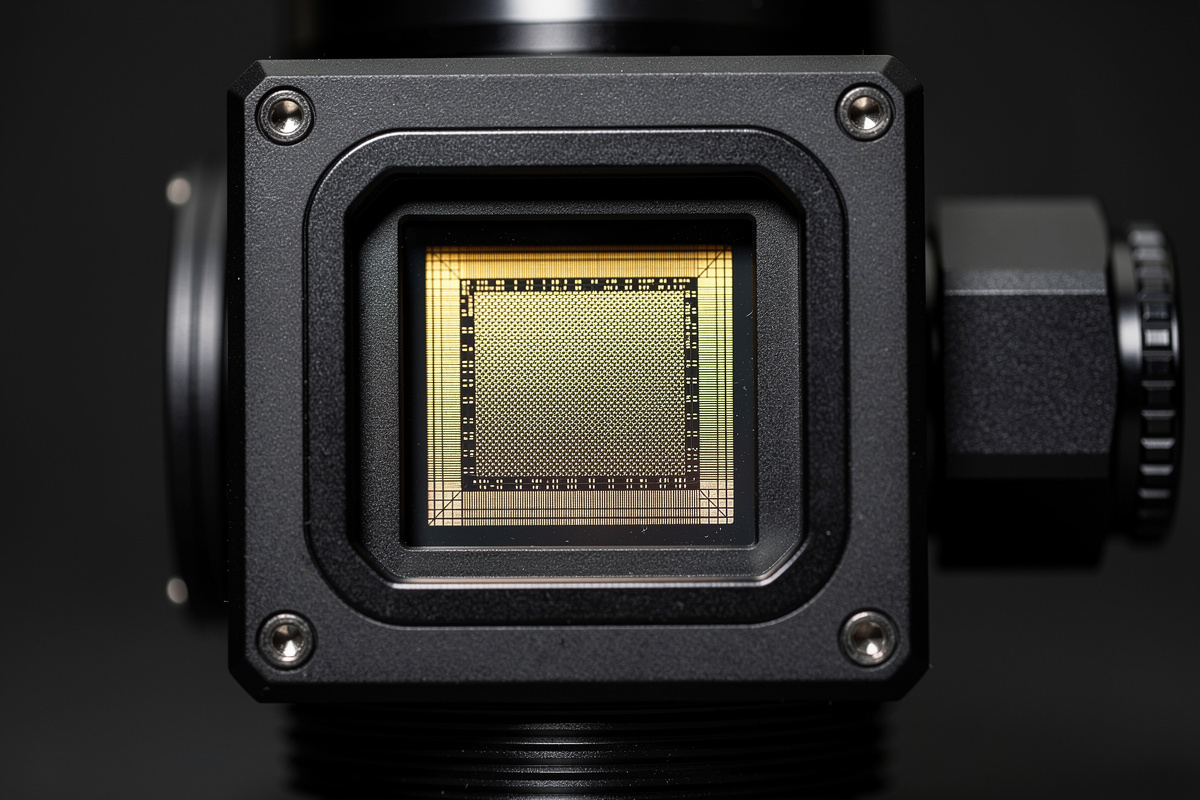
Sensor Characteristics That Matter
Four sensor specifications determine astrophotography camera performance: quantum efficiency (QE), read noise, full well capacity, and dark current. Megapixel count is largely irrelevant — a 9-megapixel ASI533 routinely produces better astrophotography images than a 24-megapixel DSLR because the dedicated camera’s sensor is optimized for low-light long-exposure work.
Quantum efficiency measures how efficiently the sensor converts photons to electrons. Modern back-illuminated sensors achieve 80-95% QE, meaning they record 80-95% of incoming photons. Older front-illuminated sensors achieve 40-60%. Higher QE means shorter total exposure times to reach the same signal-to-noise ratio.
Read noise is the noise generated by the sensor’s readout electronics when converting analog signal to digital data. Lower read noise means shorter individual exposures are viable because the noise floor is lower. Modern cooled cameras achieve 1-2 electrons of read noise, enabling 30-60 second sub-exposures that stack into results comparable to much longer individual exposures from noisier sensors.
Choosing Your First Astrophotography Camera
The right first camera depends on your budget, existing equipment, and target preferences. If you already own a DSLR or mirrorless camera, start with it — you can produce meaningful astrophotography results without buying any camera at all. Pair your existing camera with a $300-500 star tracker mount, and you have a complete beginner setup capable of capturing the Milky Way, the Andromeda Galaxy, and wide-field nebulae.
If you are buying new specifically for astrophotography, the ZWO ASI533MC Pro ($800) is the consensus best first dedicated camera. Its 1-inch square sensor produces no amp glow, its back-illuminated sensor achieves over 90% quantum efficiency, and its 9-megapixel resolution matches the resolving capability of most beginner telescopes. The square sensor format is uniquely convenient because it eliminates the need to rotate the camera for different target orientations.
Budget-conscious beginners should consider the ZWO ASI585MC ($600) or a used ZWO ASI224MC ($250-350). The ASI585 offers a newer sensor with extremely low read noise and high sensitivity. The ASI224 is a proven workhorse with a smaller sensor that is forgiving of optical imperfections and fast focal ratios. Both produce excellent images for their price.
Camera and Telescope Matching
The camera must match the telescope’s focal length and image circle. A camera with large pixels (4.63 microns on the ASI533) pairs well with fast, short refractors (f/5 to f/7 at 400-600mm focal length) where the image scale produces 1-2 arcseconds per pixel. A camera with smaller pixels (2.9 microns on the ASI585) pairs better with longer focal lengths or slower focal ratios where the finer pixel sampling resolves more detail. The best telescopes for astrophotography spoke covers focal-length matching in detail.
Sensor size must not exceed the telescope’s corrected image circle. A 72mm f/6 ED refractor typically produces a corrected field of 22-28mm diameter — sufficient for a 1-inch sensor (ASI533) but not for APS-C (ASI2600). Using a sensor larger than the image circle produces stars that become progressively elongated and vignetted toward the corners, requiring cropping that wastes sensor area and resolution. A field flattener or coma corrector extends the corrected field for larger sensors and is essentially mandatory for refractors and Newtonians used with APS-C cameras.
Essential Camera Accessories
Every cooled camera needs a 12V power supply ($20-30), a USB 3.0 cable ($10-15), and a T-ring or M42 adapter ($15-30) to connect to the telescope’s focuser. A filter drawer ($40-60) or filter wheel ($150-300) holds light pollution or narrowband filters between the camera and telescope. A dew heater strap ($20-30) prevents condensation on the camera’s protective window during long sessions. Pair the camera with the autoguiding setup to unlock 5-15 minute sub-exposures.
For DSLR users, an intervalometer ($20-40) controls shutter timing for exposures longer than 30 seconds. A T-ring adapter specific to your camera brand ($15-25) connects the camera body directly to the telescope’s focuser in place of an eyepiece. A Bahtinov mask ($15-25) placed over the telescope objective creates a diffraction pattern for precise focus.
Common Mistakes I Made on Camera Choice
The first mistake was buying the cooled camera before the mount could justify it. I bought a ZWO ASI533MC Pro while still on an EQ-3 mount that could barely guide a 50mm guide scope. The camera’s capability was wasted on a mount that could not support the long exposures the cooling enabled. I would have been better served keeping my T7i for another six months and putting the $800 toward an HEQ5. Always upgrade the mount before the camera.
The second mistake was choosing megapixels over pixel size. The first time I shopped for an astro camera I sorted by megapixel count and ended up with a small-pixel camera (2.4 microns) on a fast 480mm refractor. The camera was undersampling the seeing and producing soft, oversampled stars at every focus position. The 4.63-micron ASI533 paired with the same scope produced visibly sharper stars at the same image scale. Pixel size has to match focal length, not megapixel count.
The third mistake was buying narrowband filters before owning a monochrome camera. I bought a $200 H-alpha filter for my OSC ASI533, hoping to image emission nebulae at 25% efficiency through one Bayer color channel. It worked, but a monochrome camera with the same filter would have used 100% of pixels and produced 4x the signal. The H-alpha filter sat unused for a year until I rented a monochrome camera to actually use it properly.
What I Would Do Tonight
If you already own a DSLR, here is the night I would build for you. Skip the cooled-camera shopping lists for now. Mount the DSLR on whatever tripod you have, set ISO 1600, f/2.8, and 15-second exposures with an intervalometer firing every 17 seconds. Point at the Pleiades, Orion, or the North America Nebula in Cygnus. Shoot 100 frames over 30 minutes. Download to a laptop, run them through DeepSkyStacker (free), and process the result in Siril (free). Your first stack from a DSLR you already own will produce a recognizable image — and it will tell you whether astrophotography is the hobby you actually want to invest a cooled camera in. Buying camera gear before producing a single image with the gear you already have is the most expensive mistake I see new astrophotographers make.
Frequently Asked Questions
What is the best camera for beginner astrophotography?
A used Canon or Nikon DSLR (300-500 dollars) paired with a star tracker mount is the best beginner setup. It teaches the fundamentals of exposure, stacking, and processing without the complexity of cooled cameras and laptop-based capture. Upgrade to a cooled camera after you have mastered the basics.
Do you need a cooled camera for astrophotography?
No. DSLR cameras produce excellent astrophotography images, especially for beginners and broadband targets. Cooled cameras help during warm summer nights and for narrowband imaging where long exposures are necessary. Many award-winning amateur images come from modified DSLRs.
What is the difference between a one-shot-color and monochrome camera?
A one-shot-color camera captures red, green, and blue simultaneously through a Bayer matrix. A monochrome camera captures light intensity only and requires separate red, green, blue, and narrowband exposures combined in processing. Monochrome produces higher quality images but costs 2-3x more and requires more processing skill.
How many megapixels do you need for astrophotography?
9-20 megapixels is the sweet spot for deep sky astrophotography. More pixels do not mean better images — pixel size, quantum efficiency, and read noise matter far more. A 9-megapixel cooled camera outperforms a 24-megapixel DSLR in almost every astrophotography metric.
Should I modify my DSLR for astrophotography?
Modify if emission nebulae are your primary targets — the modification increases hydrogen-alpha sensitivity by 3-5x. Do not modify if you also use the camera for daytime photography or if your targets are primarily broadband (galaxies, star clusters, Milky Way). A used modified Canon Rebel costs 400-600 dollars total.
Can you use a security camera for astrophotography?
No. Security cameras lack raw file output, manual exposure control, and the dynamic range needed for astrophotography. Even entry-level dedicated astronomy cameras (150-300 dollars) dramatically outperform security cameras for any astronomical application.
Related Articles
Astrophotography Equipment Guide — the complete imaging chain explained.
Star Tracker Mount Guide — entry-level tracking platforms for camera lenses.
Best Telescopes for Astrophotography — refractors, Newtonians, and SCTs compared.
Field Flattener and Coma Corrector Guide — round stars across the entire sensor.
Autoguiding Setup Guide — PHD2 calibration and tuning workflow.