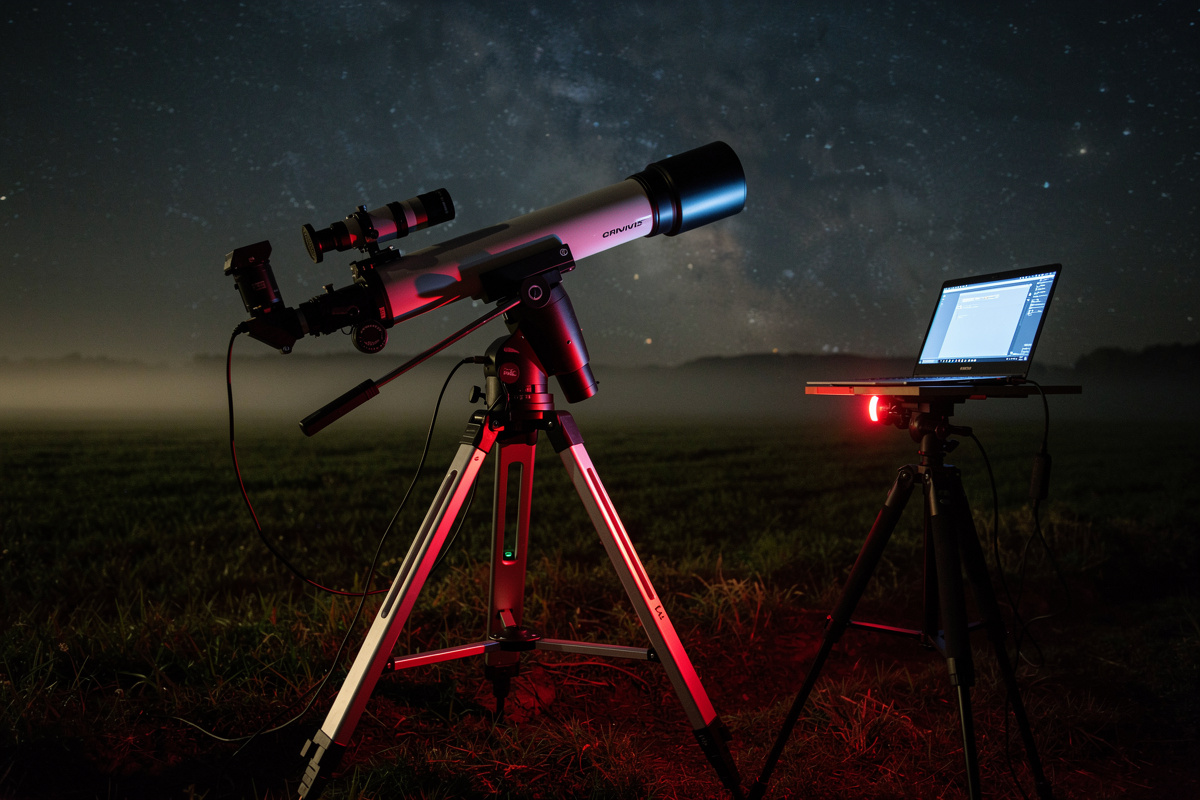
Astrophotography equipment includes a camera, telescope or lens, tracking mount, and guiding system — four components that determine image quality more than any software processing. A beginner astrophotography setup costs $800 to $1,500 using a star tracker mount, DSLR camera, and camera lens, while a dedicated deep sky imaging rig with a cooled astronomy camera, guided equatorial mount, and apochromatic refractor costs $3,000 to $6,000.
Unlike visual observing, where the telescope is the primary tool, astrophotography distributes its requirements across an imaging chain where every link affects the final result. A $2,000 camera on a $300 mount produces worse images than a $500 camera on a $1,500 mount because tracking accuracy — not sensor resolution — is the primary limit on exposure length. Understanding how each component contributes to the imaging chain prevents the most common beginner mistake: spending the entire budget on one component while neglecting the others. My own current rig is a Sky-Watcher HEQ5 Pro carrying a 72mm f/6 ED refractor with a ZWO ASI533MC Pro and an ASI120MM Mini guide camera on a 50mm guide scope, and it took me three years of buying and selling components to land on that combination. This guide covers each link in the chain and the spoke articles that go deeper on each component.
The Astrophotography Imaging Chain
Every astrophotography image passes through the same chain: mount tracks the sky, telescope or lens gathers light, camera records the light, and guiding corrects the mount’s tracking errors. Any weak link in this chain limits the entire system’s performance. The mount is the most important component because it must rotate at exactly the sidereal rate — one revolution per 23 hours and 56 minutes — while compensating for mechanical errors, atmospheric refraction, and wind.
The camera captures light onto a sensor. Dedicated astronomy cameras use cooled sensors that reduce thermal noise during long exposures, while DSLR and mirrorless cameras use uncooled sensors that generate more noise but cost less and offer a simpler learning curve. The telescope or lens focuses light onto the sensor. Its aperture determines how much light reaches the sensor per unit time, and its focal length determines image scale — how large objects appear on the sensor.
Guiding is the correction system. Even the best mounts have periodic errors in their gear trains that cause stars to trail during exposures longer than 30-60 seconds. A guide camera monitors a star through a guide scope or off-axis guider and sends correction signals to the mount, keeping the target locked on the sensor to sub-pixel accuracy. Without guiding, deep sky exposures are limited to 30-90 seconds depending on mount quality. With guiding, exposures of 5-15 minutes become routine.
Mounts: The Foundation of Astrophotography
The mount is the single most important component in an astrophotography setup. A good mount with mediocre optics produces usable images. A bad mount with premium optics produces trailed, unusable images. Mount selection should receive 40-50% of the total astrophotography budget. The dedicated star tracker mount guide covers the entry-level tracking platforms in detail.
Star Tracker Mounts ($300-500)
Star trackers are compact, portable tracking platforms designed for camera lenses and small telescopes. The Sky-Watcher Star Adventurer and iOptron SkyGuider Pro are the dominant models. Star trackers track at sidereal rate, enabling 60-180 second exposures with camera lenses up to 200mm focal length. They weigh 2-3 pounds, fit in a camera bag, and require no power other than AA batteries.
Star trackers are the best entry point for astrophotography because they are inexpensive, portable, and teach the fundamentals of polar alignment and exposure without the complexity of a full equatorial mount. Pair a star tracker with a DSLR and a 50mm or 85mm camera lens, and you can capture the Milky Way, wide-field nebulae, and star clusters that rival images from much more expensive equipment. Most star trackers handle payloads up to 5-11 pounds.
Equatorial GoTo Mounts ($800-2,500)
Equatorial GoTo mounts combine motorized sidereal tracking with computer-controlled object finding. The Sky-Watcher HEQ5 Pro ($800-1,000) and EQ6-R Pro ($1,400-1,600) are the workhorses of amateur astrophotography — Sky-Watcher publishes official EQ6-R Pro periodic-error specifications at ±5 arcseconds, with autoguiding bringing tracking down to sub-arcsecond. The HEQ5 handles telescopes up to 15-20 pounds for imaging. The EQ6-R handles 25-30 pounds. Both support autoguiding through an ST4 port or ASCOM-compatible USB connection.
German equatorial mounts (GEMs) require polar alignment — aligning the mount’s rotational axis with Earth’s rotational axis — before imaging. Polar alignment is the single most critical setup step. A misaligned mount produces field rotation that no amount of guiding can correct. Most astrophotographers use a polar scope built into the mount or software-assisted polar alignment routines in their capture software to achieve polar alignment accuracy within 1-2 arcminutes.
Premium Mounts ($3,000-8,000)
Premium mounts from 10Micron, Astro-Physics, and Software Bisque offer sub-arcsecond periodic error, enabling unguided imaging with short refractors and guided imaging with long focal length telescopes. These mounts cost $3,000-8,000 and are justified only when the imaging payload exceeds what mid-range mounts can handle or when the highest tracking accuracy is required for planetary imaging or narrowband work with very long focal lengths.
Cameras for Astrophotography
Camera choice depends on budget, target type, and willingness to process images. DSLR and mirrorless cameras offer the simplest path because they include a screen, battery, and storage. Dedicated astronomy cameras require a laptop for control and image capture but deliver superior results through cooling, higher quantum efficiency, and narrower pixel sizes matched to specific telescopes. The dedicated astrophotography cameras spoke compares DSLR vs cooled vs monochrome in depth.
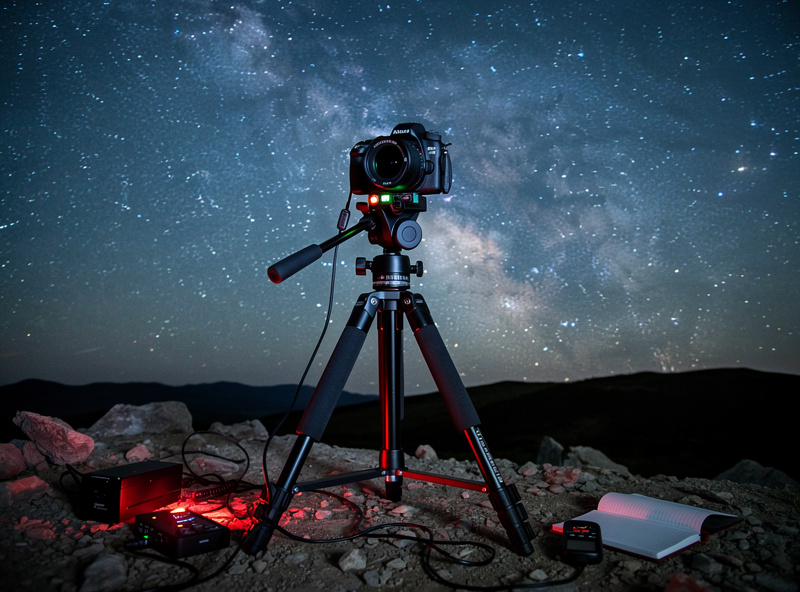
DSLR and Mirrorless Cameras ($500-2,000)
Modified DSLRs — cameras with the infrared blocking filter removed — are the most popular astrophotography cameras. A used Canon EOS Ra, Nikon D810A, or any Canon DSLR modified by a third-party service captures 3-5x more hydrogen-alpha emission than a stock camera. Stock cameras work fine for star clusters, wide-field Milky Way shots, and broadband targets like galaxies but struggle with emission nebulae because their sensors’ infrared filters block the critical hydrogen-alpha wavelength.
Mirrorless cameras from Sony (A7 series), Canon (EOS R series), and Nikon (Z series) offer live-view focusing aids, electronic shutters that eliminate vibration, and compact bodies. The Sony A7III is widely considered the best mirrorless camera for astrophotography due to its low read noise and excellent high-ISO performance. Any camera that can shoot manual exposures of 30 seconds or longer and save raw files is capable of astrophotography.
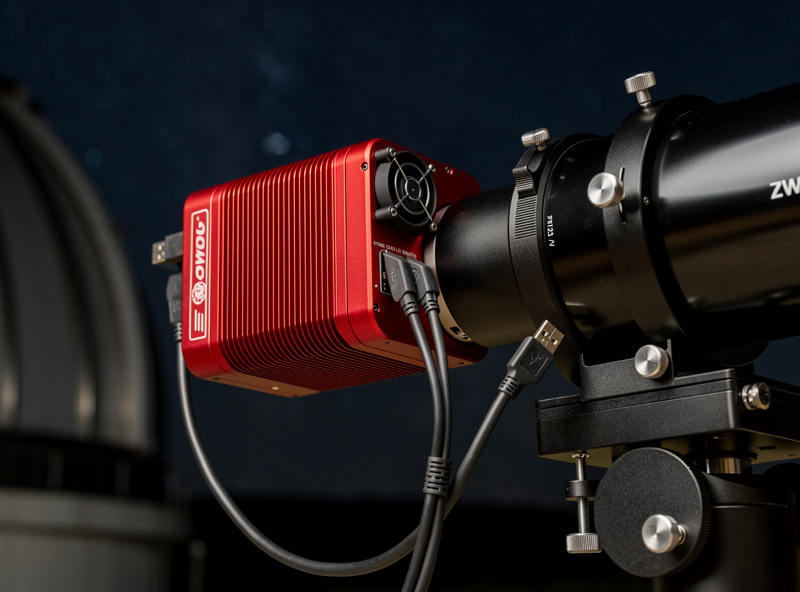
Dedicated Astronomy Cameras ($500-5,000)
Cooled astronomy cameras from ZWO (ASI series), QHY, and Player One use thermoelectric cooling to reduce sensor temperature 30-40 degrees below ambient, dramatically reducing thermal noise during long exposures. The ZWO ASI533MC Pro ($800) is the most popular beginner cooled camera — its square sensor eliminates the need for camera rotation and its 9-megapixel resolution matches most short refractors’ resolving capability. ZWO publishes a complete ASI533MC Pro datasheet including QE curves, read noise figures, and temperature regulation specifications.
Monochrome cameras with filter wheels offer the highest image quality because they capture each color channel (red, green, blue) and narrowband channel (hydrogen-alpha, oxygen-III, sulfur-III) separately, then combine them in processing. A monochrome camera plus filter wheel costs 2-3x more than a one-shot-color camera but produces images with higher signal-to-noise ratio and eliminates the artifacts that color cameras introduce through their Bayer matrix interpolation.
Camera Sensor Size and Field of View
Sensor size determines how much sky a camera captures with a given telescope. A full-frame sensor (36x24mm) captures the widest field. An APS-C sensor (23x15mm) captures 60% of full-frame area. A micro four-thirds sensor (17x13mm) captures 40%. The sensor must match the telescope’s image circle — telescopes designed for photography project a corrected, flat image across a specific diameter. Using a sensor larger than the image circle produces dark, vignetted corners.
Pixel size matters for image scale. Larger pixels collect more light per exposure but resolve less detail. Smaller pixels resolve finer detail but require longer exposures to reach the same signal-to-noise ratio. The ideal pixel size for a given telescope focal length produces 1-2 arcseconds per pixel — the typical atmospheric seeing limit. For a 600mm f/6 refractor, 3.76-micron pixels (ZWO ASI533) produce 1.3 arcseconds per pixel, matching typical seeing conditions.
Telescopes for Astrophotography
Not every telescope is suitable for astrophotography. Visual telescopes optimized for planetary observation often have long focal lengths, slow focal ratios, and alt-azimuth mounts that are unsuitable for long-exposure imaging. Astrophotography telescopes prioritize fast focal ratios (f/4 to f/7), flat corrected fields, and compatibility with equatorial mounts. The dedicated best telescopes for astrophotography spoke compares refractors, Newtonians, and SCTs across budget tiers.
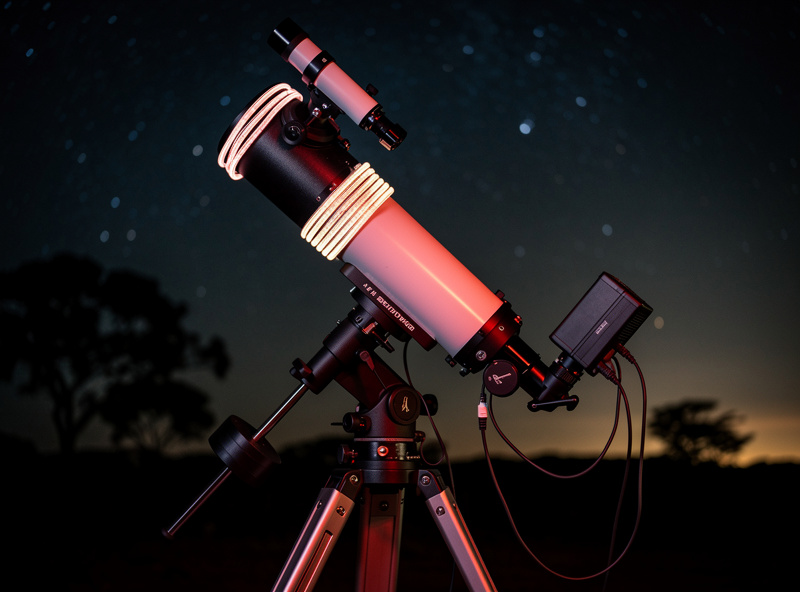
Apochromatic Refractors ($800-5,000)
Apochromatic (APO) refractors use multi-element lens designs that correct chromatic aberration, producing sharp stars to the edges of full-frame sensors. The most popular astrophotography refractors are 60-80mm aperture at f/5 to f/7 focal ratio. A 72mm f/6 ED doublet refractor costs $400-700 and produces excellent wide-field images. A 80mm f/6 triplet APO costs $1,200-2,500 and delivers apochromatic correction across full-frame sensors.
Refractors are the best telescope type for beginner astrophotography because they require no collimation, have no central obstruction, and produce round stars at any focal ratio. Their main limitation is aperture — a 80mm refractor collects far less light than a 200mm reflector, requiring longer total exposure times to reach equivalent signal levels. Most refractors and Newtonians benefit from a field flattener or coma corrector to produce round stars across the entire sensor.
Newtonian Reflectors ($300-1,500)
Newtonian reflectors offer the most aperture per dollar. A 6-inch f/4 imaging Newtonian costs $300-500 and collects 56% more light than an 80mm refractor. An 8-inch f/4 costs $400-800. Newtonians require collimation before every session and benefit from coma correctors to round stars at the field edges. Their fast focal ratios (f/4 to f/5) are ideal for deep sky imaging where short exposures per frame are preferred.
SCTs and Maksutovs ($1,000-3,000)
Schmidt-Cassegrain telescopes (SCTs) offer long focal lengths (1,500-2,500mm) in compact tubes, making them ideal for planetary imaging and small deep sky objects like planetary nebulae and distant galaxies. An 8-inch SCT at f/10 has 2,000mm focal length — perfect for resolving planetary detail but producing a very narrow field of view unsuitable for large nebulae. Focal reducers (f/6.3 or f/7) expand the field and reduce exposure times, making SCTs more versatile for deep sky work.
Guiding: Autoguider Systems
Autoguiding corrects mount tracking errors in real time, enabling exposures longer than 30-90 seconds. The system consists of a guide camera, a guide scope or off-axis guider, and software that analyzes guide star position and sends correction pulses to the mount. The dedicated autoguiding setup guide walks through the full PHD2 calibration and tuning workflow.
Guide Scope vs Off-Axis Guider
A guide scope is a small refractor (50-80mm aperture) mounted piggyback on the main telescope. The guide camera images a star through the guide scope, and the software tracks that star’s position, sending corrections when it drifts. Guide scopes are simple, inexpensive ($100-200), and easy to set up. Their limitation is differential flexure — the guide scope and main telescope can bend independently during long exposures, causing the guide corrections to not perfectly match the main camera’s movement.
An off-axis guider (OAG) uses a small prism to divert light from the edge of the main telescope’s field to the guide camera. Because the guide camera looks through the same optical path as the main camera, differential flexure is eliminated. OAGs cost $100-300 and require a brighter guide star than guide scopes because they capture less light. For focal lengths under 600mm, a guide scope is sufficient. For longer focal lengths or when the highest accuracy is needed, an OAG is preferred.
Guide Cameras ($150-500)
Dedicated guide cameras from ZWO (ASI120MM Mini, $150) and QHY use small, sensitive sensors to image guide stars. A guide camera needs to see at least one star in its field at all times during the exposure — this typically requires the guide scope to have 30-50mm aperture or more. USB-powered guide cameras plug directly into a laptop running PHD2, the standard free autoguiding software maintained by Stark Labs and the open-source community.
Budget Astrophotography Setup Examples
| Component | Beginner ($800-1,200) | Intermediate ($2,500-4,000) | Advanced ($5,000-10,000) |
|---|---|---|---|
| Mount | Sky-Watcher Star Adventurer ($350) | Sky-Watcher HEQ5 Pro ($900) | Sky-Watcher EQ6-R Pro or ZWO AM5 ($1,500) |
| Telescope/Lens | Camera lens 135mm f/2 ($200-400) | 72mm f/6 ED refractor ($500-700) | 80mm f/6 triplet APO ($1,500-2,500) |
| Camera | Used DSLR ($300-500) | ZWO ASI533MC Pro ($800) | ZWO ASI2600MM Pro + filter wheel ($2,000) |
| Guiding | None (60-180s unguided) | ASI120MM + 50mm guide scope ($250) | OAG + ASI174MM Mini ($400) |
| Accessories | Intervalometer, tripod | Laptop, dew heater, cables | Dedicated mini PC, power system, dew strips |
| Targets | Milky Way, wide nebulae, star clusters | Deep sky nebulae, galaxies, clusters | All deep sky, narrowband, high-resolution |
Accessories and Power
Astrophotography in the field requires portable power, dew prevention, and cable management. A 12V 20Ah lithium battery ($100-150) powers a mount, camera, and guide camera for 6-8 hours. Dew heaters wrapped around the telescope objective prevent condensation that ruins images in the second half of the night. USB hubs and short cables reduce cable drag that can snag during meridian flips.
A dedicated mini PC ($150-300) running NINA, APT, or SGP capture software eliminates the need to bring a full laptop to the field. The mini PC connects to the mount, camera, and guide camera via USB and can be controlled remotely via WiFi from a tablet or phone. This setup is lighter, cheaper, and more reliable than a laptop, especially in cold weather where laptop batteries drain rapidly.
The Astrophotography Workflow: From Setup to Final Image
A typical deep sky astrophotography session follows a predictable sequence that takes 3-6 hours from setup to the last exposure. Understanding this workflow before buying equipment helps you plan what you actually need for a productive night of imaging.
Polar alignment comes first — 10-20 minutes aligning the mount’s axis with the celestial pole. Most astrophotographers use a polar scope built into the mount or software-assisted routines like NINA’s Three-Point Polar Alignment or SharpCap’s polar alignment tool. Accurate polar alignment to within 1-2 arcminutes prevents field rotation during long exposures and is the single most important setup step.
Framing and focusing follow polar alignment. The mount slew to the target using GoTo controls, and the camera captures a test exposure of 5-10 seconds to verify the target is in frame. Focusing uses a Bahtinov mask — a $20-30 laser-cut mask placed over the telescope objective that creates a distinctive diffraction pattern visible on bright stars. When the three diffraction spikes converge into a symmetrical pattern, focus is achieved. Electronic focusers ($150-400) automate this process and maintain focus as temperature changes shift the telescope’s focal point throughout the night.
Guiding calibration takes 2-3 minutes in PHD2. The software measures the mount’s response to guide pulses in both axes and calculates correction parameters. Once calibrated, guiding typically achieves 0.5-1.5 arcsecond RMS tracking accuracy on mid-range mounts, enabling 5-10 minute sub-exposures with focal lengths up to 1,000mm.
Image capture runs for 2-4 hours, collecting 20-60 sub-exposures of 2-10 minutes each depending on target brightness and filter used. Total integration time — the sum of all sub-exposure durations — determines final image quality. Most amateur deep sky images use 2-8 hours of total integration. More integration time reduces noise and reveals fainter detail, with diminishing returns after about 10-15 hours per target.
Post-processing in software like PixInsight, Siril (free), or Adobe Photoshop converts raw sub-exposures into a final image through stacking (aligning and averaging sub-exposures to reduce noise), gradient removal, color calibration, noise reduction, and contrast enhancement. Processing skill is as important as equipment quality — a well-processed image from modest equipment often outperforms a poorly processed image from premium equipment.
Common Astrophotography Mistakes I Made
The most expensive mistake in astrophotography is buying equipment in the wrong order. I bought a ZWO ASI533MC Pro before upgrading from my old EQ-3 mount, and the camera spent six months sitting on a mount that could not track accurately enough to use any of its capability. The correct order is: mount first, then telescope, then camera, then guiding, then accessories. I sold the ASI533 and rebought it after the HEQ5 arrived; the second time it actually produced usable images.
Under-polar-aligning is the second most common mistake. My first six imaging sessions on the HEQ5 were all polar-aligned to about 10 arcminutes of error using just the polar scope and Polaris’s expected position from the printed reticle. Stars trailed in every 5-minute exposure. Once I switched to SharpCap’s polar alignment routine and got within 1 arcminute consistently, the trailing problem disappeared overnight.
Ignoring calibration frames was the third. The first three months I imaged, I never shot dark frames, flat frames, or bias frames — I just stacked my light frames and wondered why my images had vignetting and amp glow. Adding 15 minutes of calibration frame collection at the end of every session immediately produced images that looked twice as clean. Calibration frames are not optional; they are the cheapest image-quality upgrade in astrophotography.
What I Would Do Tonight
If you are starting astrophotography tonight with a beginner kit (Star Adventurer, used DSLR, 50-135mm lens), here is the session I would build. Polar align to within 5 arcminutes using the polar scope reticle and a planetarium app showing Polaris’s offset. Mount the camera, point at the Pleiades or the North America Nebula, and shoot a 30-second test exposure at ISO 1600 f/2.8. Verify focus with a Bahtinov mask or live view at 10x zoom. Once focus is locked, shoot 60-90 second exposures continuously for 90 minutes — that is 60-90 sub-exposures. End the session with 30 dark frames (lens cap on, same exposure settings, same temperature). Process in DeepSkyStacker (free) and Siril (free). Your first session will not produce a magazine cover, but it will give you a stack with detail no single exposure ever shows. That is the moment astrophotography starts working.
Frequently Asked Questions
What equipment do I need to start astrophotography?
A camera (DSLR or mirrorless), a tracking mount (300-500 dollar star tracker), and a tripod is the minimum. Add a camera lens (50-135mm focal length) and an intervalometer for shutter control. This 800-1200 dollar setup captures the Milky Way, wide-field nebulae, and star clusters with 60-180 second exposures.
What is the most important piece of astrophotography equipment?
The mount. Tracking accuracy determines maximum exposure length, and exposure length determines image quality more than any other factor. A 500 dollar camera on a 1000 dollar mount produces better images than a 2000 dollar camera on a 300 dollar mount. Budget 40-50 percent of your total astrophotography spend on the mount.
Can you do astrophotography with a regular DSLR?
Yes. Any DSLR or mirrorless camera that shoots manual exposures and saves raw files is capable of astrophotography. Modified DSLRs with the infrared filter removed capture 3-5x more nebula detail than stock cameras, but stock cameras produce excellent Milky Way and star cluster images.
How much does a good astrophotography setup cost?
A beginner setup with a star tracker, used DSLR, and camera lens costs 800 to 1200 dollars. An intermediate setup with an equatorial GoTo mount, dedicated astronomy camera, and small refractor costs 2500 to 4000 dollars. An advanced setup with a premium mount, cooled monochrome camera, and triplet APO refractor costs 5000 to 10000 dollars.
Do you need autoguiding for astrophotography?
Not for beginner setups. Star tracker mounts and camera lenses produce good results with 60-180 second unguided exposures. Autoguiding becomes necessary with equatorial GoTo mounts and telescopes longer than 400mm focal length, where exposures over 60-90 seconds require active tracking correction to prevent star trailing.
What is the difference between a cooled and uncooled astronomy camera?
A cooled camera uses thermoelectric cooling to reduce sensor temperature 30-40 degrees below ambient, dramatically reducing thermal noise during long exposures. Uncooled cameras (DSLRs) generate more thermal noise, especially in warm weather, but are cheaper and simpler. Cooled cameras are preferred for serious deep sky imaging; uncooled cameras work for wide-field and beginner work.
Related Articles
Star Tracker Mount Guide — entry-level tracking platforms for camera lenses.
Best Telescopes for Astrophotography — refractors, Newtonians, and SCTs compared.
Astrophotography Cameras — DSLR vs cooled vs monochrome in depth.
Field Flattener and Coma Corrector Guide — round stars across the entire sensor.
Autoguiding Setup Guide — PHD2 calibration and tuning workflow.
Astrophotography Guide — techniques and settings for deep sky imaging.
Field Power for Astrophotography — battery solutions for all-night imaging sessions.
Remote Astrophotography Rigs — networking your imaging setup for remote control.