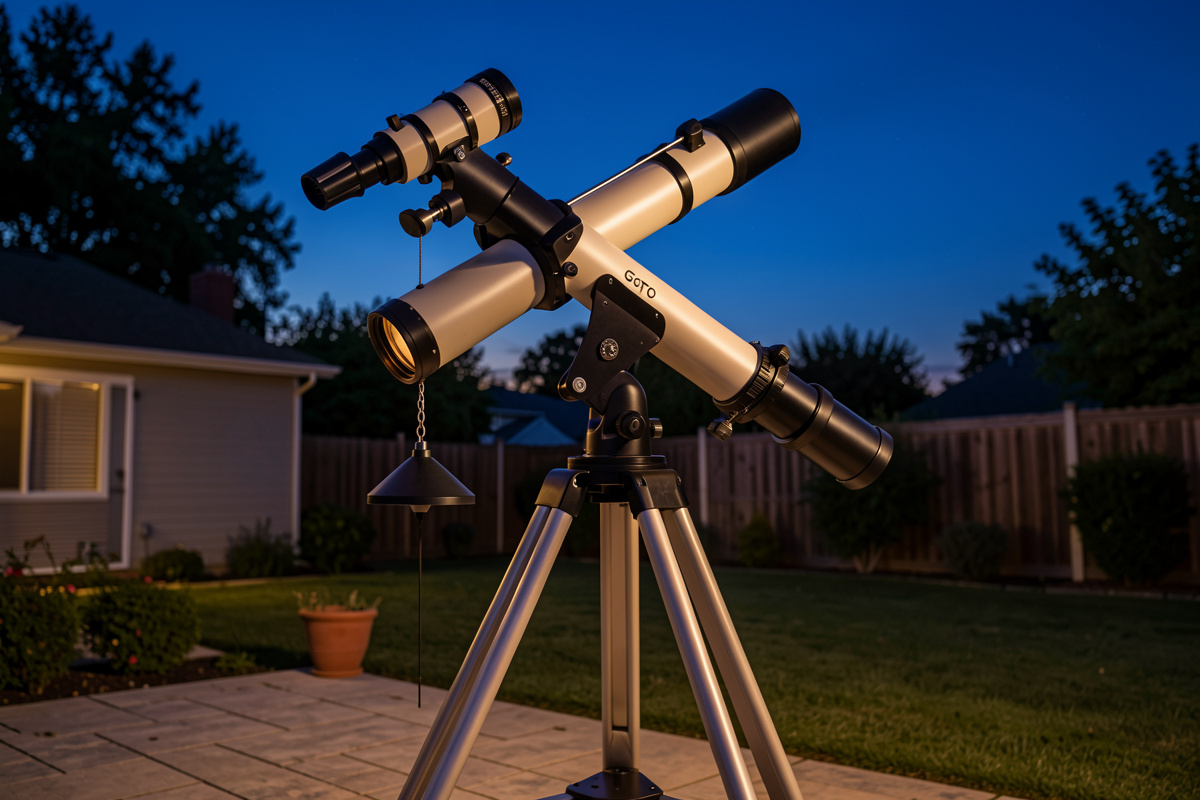
The telescope mount matters as much as the telescope. A shaky mount turns a sharp 8-inch SCT into a wobbling mess, while a solid mount makes a modest 100mm refractor a joy to use. Most beginners spend 80% of their budget on aperture and treat the mount as an afterthought — that is the single most expensive mistake in the hobby.
I learned this the slow way. My first real scope, a 127mm Maksutov, rode on an undersized photo tripod that shivered for three seconds every time I touched the focuser. The optics were fine; the experience was miserable. Years and several mounts later — a manual Dobsonian rocker box, an alt-azimuth GoTo, and a Sky-Watcher EQ6-R Pro class equatorial that I guide for imaging — I can tell you the mount is where you should overspend, not under-spend. This guide walks through every mount decision in the order you actually face it, and links out to the deeper pieces in this cluster when you want to go further on one topic.
What a Telescope Mount Actually Does
A mount has exactly two jobs: hold the optical tube dead still, and let you move it smoothly to find and follow objects. The Earth rotates 15 arcseconds every second, so at high magnification a planet drifts out of the eyepiece in well under a minute — the mount has to counter that motion or do nothing useful.
Those two jobs pull in opposite directions, which is why mounts are hard. Stability wants mass, short levers, and stiff bearings. Smooth pointing wants free movement. A good mount resolves the tension; a cheap one fails at both, vibrating when still and binding when you try to nudge it. The rule I give every beginner: the mount and tripod together should weigh more than the scope you put on them, and they should settle from a deliberate tap in under two seconds. If the view is still ringing after you focus, the mount is too light for the job. The whole point of the mount types overview and this cluster is to stop you buying the scope first and discovering the mount problem later.
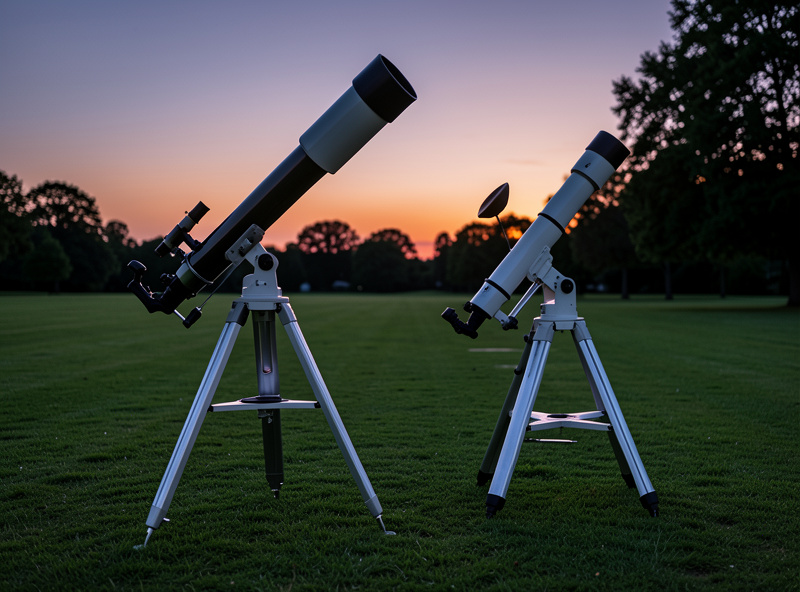
The Two Families: Alt-Azimuth vs Equatorial
Every astronomical mount is one of two designs. Alt-azimuth (alt-az) moves up-down and left-right, like a camera tripod — intuitive, fast to set up, and cheaper. Equatorial (EQ) tilts one axis to point at the celestial pole so a single motor can follow the sky’s curved arc, which is non-negotiable for long-exposure imaging.
The trade is real and it shaped my whole kit. My Dobsonian and my grab-and-go Mak both sit on alt-az platforms because for visual observing they are simpler and let me be looking through the eyepiece in two minutes. But an alt-az tracks the sky in two axes simultaneously, and the field of view slowly rotates around the centre — fine for the eye, fatal for a 5-minute exposure where stars at the edge smear into arcs. That field rotation is exactly why my imaging scope lives on an equatorial. I go much deeper on this fork in the equatorial vs alt-azimuth comparison, including the wedge workaround that lets an alt-az fork mount image after all. The short version: visual-only, start alt-az; serious deep-sky imaging, go equatorial from day one.
Manual, Push-To, and GoTo: How You Point
Independent of alt-az versus equatorial is how you find things: by hand (manual), with a phone or display nudging you toward the target (push-to), or by motors that slew there for you (GoTo). Each step up adds cost and convenience but removes a skill — and the skill is worth having. A GoTo mount can hold 40,000 objects in its database, yet learning to star-hop first made me a far better observer.
I ran this whole progression in order, and I would do it the same way again. The manual Dobsonian taught me the sky — where the constellations sit, how to hop from a bright star to a faint galaxy, how to read a star atlas at the eyepiece. When I later added an alt-az GoTo and then the equatorial GoTo, the automation was a genuine convenience rather than a crutch, because I already knew what I was pointing at and could tell when the alignment was wrong. That matters: a GoTo that is poorly aligned slews confidently to empty sky, and a beginner who never learned the sky has no way to recover. If you go straight to GoTo, fine — but read the GoTo setup and alignment guide first, because the alignment routine is the part everyone gets wrong on night one.
Single-Axis Tracking vs Full GoTo
There is a useful middle ground between a manual mount and a full computerised GoTo: a motorised single-axis drive. On an equatorial mount, a single motor on the right-ascension axis follows the sky at the sidereal rate while you find targets by hand. It costs a fraction of a GoTo and solves the one problem that matters most at the eyepiece — keeping the object centred.
For visual planetary work this is genuinely all many people need. You star-hop to Jupiter once, switch on the drive, and the planet sits still while you study the belts and wait for the seeing to steady — no constant re-nudging. Full GoTo adds object-finding, dual-axis correction, and the database, which earns its keep for imaging and for hunting faint deep-sky objects you cannot easily star-hop to. I break the decision down with prices and real use cases in the single-axis versus GoTo comparison. If your budget is tight and you observe planets and the Moon, a single-axis drive on a decent EQ mount is one of the best-value upgrades in the hobby.
Tracking Rates: Sidereal Is Not the Only One
A tracking mount does not move at one speed. The default is the sidereal rate — 15.041 arcseconds per second, the speed the stars appear to drift as Earth rotates. But the Moon, Sun, and planets move against that background, so precise tracking of those needs their own rates.
The Moon is the obvious case: it drifts roughly half a degree eastward against the stars every hour, so the lunar rate (about 14.685 arcseconds per second) is noticeably slower than sidereal. Track the Moon at sidereal and it slowly creeps across the field over a long session or a lunar imaging run. The solar rate is a hair under sidereal, and the “King rate” is a refined sidereal that compensates for atmospheric refraction near the horizon — a detail that only matters for long unguided exposures of objects riding low, which from my northern latitude is most of the planets. I cover all of these, plus why they exist, in the dedicated tracking rates and periodic error guide. For visual use the difference is minor; for imaging it is the difference between round stars and trails.
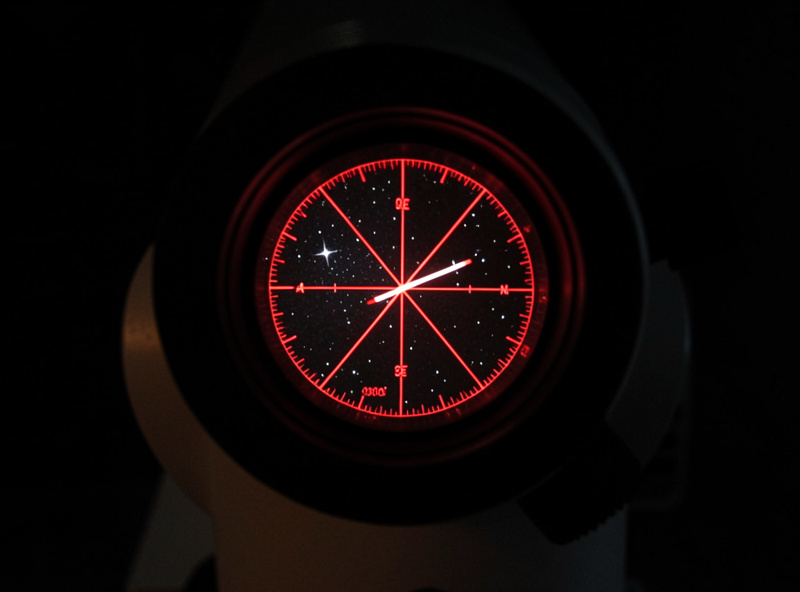
Polar Alignment: The Skill That Unlocks Tracking
An equatorial mount only tracks accurately if its right-ascension axis points at the true celestial pole. Getting it there is polar alignment, and it is the single skill that separates frustrating EQ ownership from rewarding EQ ownership. Polaris sits about 0.7 degrees off the actual north celestial pole, so “point at the North Star and call it done” is not good enough for imaging.
For visual observing, a rough polar alignment using the polar scope gets you tracking that keeps objects in the eyepiece for many minutes — perfectly adequate. For imaging, you need it tight, and that means either careful polar-scope work, a drift alignment, or a software-assisted routine like SharpCap or the N.I.N.A. three-point method. From my dark site I use plate-solving alignment and get it dialled in faster than the old polar-scope dance ever allowed. The full method-by-method walkthrough lives in the polar alignment guide, including the southern-hemisphere problem and what to do when Polaris is hidden behind a roofline — a real issue from a suburban backyard.
Periodic Error, Backlash, and Guiding
No mount tracks perfectly. The worm gear that drives the right-ascension axis has tiny machining imperfections, so the tracking speeds up and slows down in a repeating cycle — periodic error — that matches the worm’s rotation period (commonly a few hundred seconds). Backlash is the related slop: the dead zone before gears re-engage when you reverse direction, most noticeable on the declination axis.
For visual work, neither matters much. For imaging, both do, and there are two answers: periodic error correction (PEC), where the mount learns and replays its own error curve, and autoguiding, where a second small camera watches a star and sends constant micro-corrections to both axes. With my guide scope and PHD2 I hold total guiding error well under one arcsecond on a good night, which turns unusable two-minute subs into clean ones. I explain the mechanism and the fixes in the tracking rates and periodic error guide, and the full guiding workflow is in our autoguiding setup guide. The key insight: you do not eliminate periodic error, you out-correct it.
Payload Capacity: The Number Everyone Gets Wrong
Every mount lists a payload capacity, and almost everyone reads it wrong. A mount rated for 20 kg will hold 20 kg — but it will not image at 20 kg. The honest rule for astrophotography is to load an equatorial mount to no more than 50–65% of its rated capacity, because imaging punishes flex, vibration, and wind in a way that visual observing forgives.
This is where total-cost-of-ownership thinking pays off. A mount that comfortably carries your current scope visually may be hopeless once you add a guide scope, camera, dew heater, and cabling and then ask it to track for five-minute exposures. I size imaging mounts to the scope I might own in two years, not the one on the dovetail tonight — buying a mount twice is more expensive than buying enough mount once. For visual-only use you can run closer to the rated number, since a brief wobble after focusing is merely annoying, not ruinous. Counterweights matter here too: a properly balanced equatorial puts almost no strain on the motors, while an unbalanced one fights itself all night.
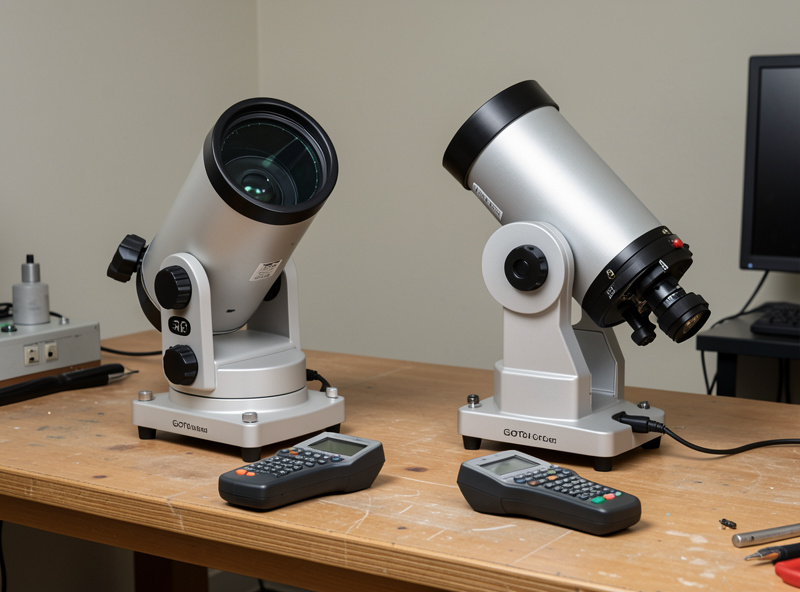
Celestron vs Sky-Watcher: The Synta Connection
The two names beginners compare most are Celestron and Sky-Watcher, and there is a fact that reframes the whole debate: both are owned by the same parent company, Synta, and several of their mounts share core mechanics. The differences that matter are the hand controller, the software ecosystem, and the price at your local dealer — not some deep gap in engineering quality.
Celestron uses the NexStar hand controller and the StarSense ecosystem; Sky-Watcher uses SynScan, which also runs over Wi-Fi from a phone app. I run a SynScan mount and find the Wi-Fi control genuinely convenient, but I would not steer anyone away from a well-priced Celestron AVX or CGX over the controller alone. The real decision is matching capacity and budget to your scope. I lay out the model-by-model equivalents — which Sky-Watcher lines up against which Celestron — in the Celestron and Sky-Watcher mount comparison. Buy on capacity, dealer support, and price, and you will not go wrong with either.
Matching the Mount to What You Observe
The right mount falls out of one question: what do you actually want to look at, and do you want to photograph it? Visual planetary and lunar observers are best served by a stable alt-az or a single-axis-driven EQ. Deep-sky imagers need a guided equatorial sized to their optics. There is no “best mount” — only the best mount for your targets and your budget.
Here is how I steer people. If you mainly cruise the Moon, planets, and bright clusters by eye, a sturdy alt-az — including a Dobsonian rocker box, which is just an alt-az mount built into the scope — gives you the most aperture per dollar; see why in the Dobsonian value guide. If you want to chase faint galaxies and nebulae and let a database do the finding, an alt-az GoTo is excellent for visual. The moment you want long-exposure deep-sky photos, you need an equatorial GoTo, polar alignment, and guiding — and a realistic look at the rest of the imaging chain in our astrophotography equipment guide and best telescopes for astrophotography. For a portable camera-and-lens setup, a single-axis star tracker is a brilliant low-cost entry, covered in the star tracker mount guide.
Mount Types Compared
| Mount Type | Best For | Tracking | Imaging? | Relative Cost |
|---|---|---|---|---|
| Manual alt-az / Dobsonian | Visual deep-sky, max aperture per dollar | None (manual nudge) | No (planetary lucky-imaging only) | $ |
| Alt-az GoTo | Visual all-rounder, object finding | Two-axis, field rotates | Short planetary only | $$ |
| EQ with single-axis drive | Visual planetary, budget tracking | RA only, sidereal | Short exposures, no guiding | $$ |
| EQ GoTo (e.g. EQ6-R / AVX class) | Deep-sky imaging, serious visual | Dual-axis, guidable | Yes — the standard imaging mount | $$$ |
| Star tracker (single-axis portable) | Wide-field with camera lenses | RA only, sidereal | Yes, for lenses and small scopes | $$ |
As an Amazon Associate I earn from qualifying purchases. When you are ready to compare current mounts, a search for equatorial GoTo telescope mounts is the most useful starting point, since prices and bundles shift constantly.
Frequently Asked Questions
Do I really need an equatorial mount for a beginner telescope?
No. For visual observing of the Moon, planets, and bright objects, a stable alt-azimuth or Dobsonian mount is simpler, cheaper, and faster to set up. You only need an equatorial mount once you want to do long-exposure deep-sky astrophotography, where its single-axis tracking and polar alignment become essential.
How much of my budget should go to the mount?
For visual use, plan to spend at least as much on the mount and tripod as on the optical tube. For imaging, the mount is the most important purchase of all and often costs more than the scope, because tracking accuracy determines whether your exposures are usable. Under-spending on the mount is the most common beginner mistake.
What is the difference between push-to and GoTo mounts?
A push-to mount uses encoders or a phone app to tell you which way to nudge the scope by hand toward a target, but you do the moving. A GoTo mount uses motors to slew to the object automatically and then tracks it. GoTo costs more and adds tracking; push-to is cheaper and keeps you engaged with the sky.
Can an alt-azimuth mount be used for astrophotography?
For short planetary and lunar imaging, yes, since exposures are fractions of a second. For long deep-sky exposures, an alt-az mount suffers field rotation that turns stars into arcs unless you add an equatorial wedge or a field derotator. For serious deep-sky imaging, an equatorial mount is the practical choice.
What payload capacity do I need for imaging?
Load an equatorial mount to no more than about 50 to 65 percent of its rated payload for astrophotography. Imaging punishes flex and vibration far more than visual use, so a mount rated for 20 kg is realistically a 10 to 13 kg imaging mount once you add a guide scope, camera, and cabling.
Are Celestron and Sky-Watcher mounts really similar?
Yes. Both brands are owned by the same parent company, Synta, and several mount lines share core mechanics. The main practical differences are the hand controller and software ecosystem (Celestron NexStar versus Sky-Watcher SynScan) and the local price. Choose based on payload capacity, dealer support, and cost rather than brand loyalty.