Ask ten beginners what they want to see through their first telescope and nine of them say “the planets.” Then they buy the wrong scope, point it at Jupiter on a night of mushy seeing, and walk away disappointed because the brochure promised Hubble and the eyepiece delivered a wobbling cream-coloured disc. I have watched that disappointment land on more new observers than any other moment in this hobby, and almost all of it is avoidable. The honest answer to “what’s the best telescope for planets” is not a single model on a listicle. It’s a set of priorities — aperture, focal ratio, optical quality, and a mount steady enough to hold high power — and once you understand how those trade against each other, you can pick the right scope for your sky and your wallet instead of the one a sponsored review told you to buy.
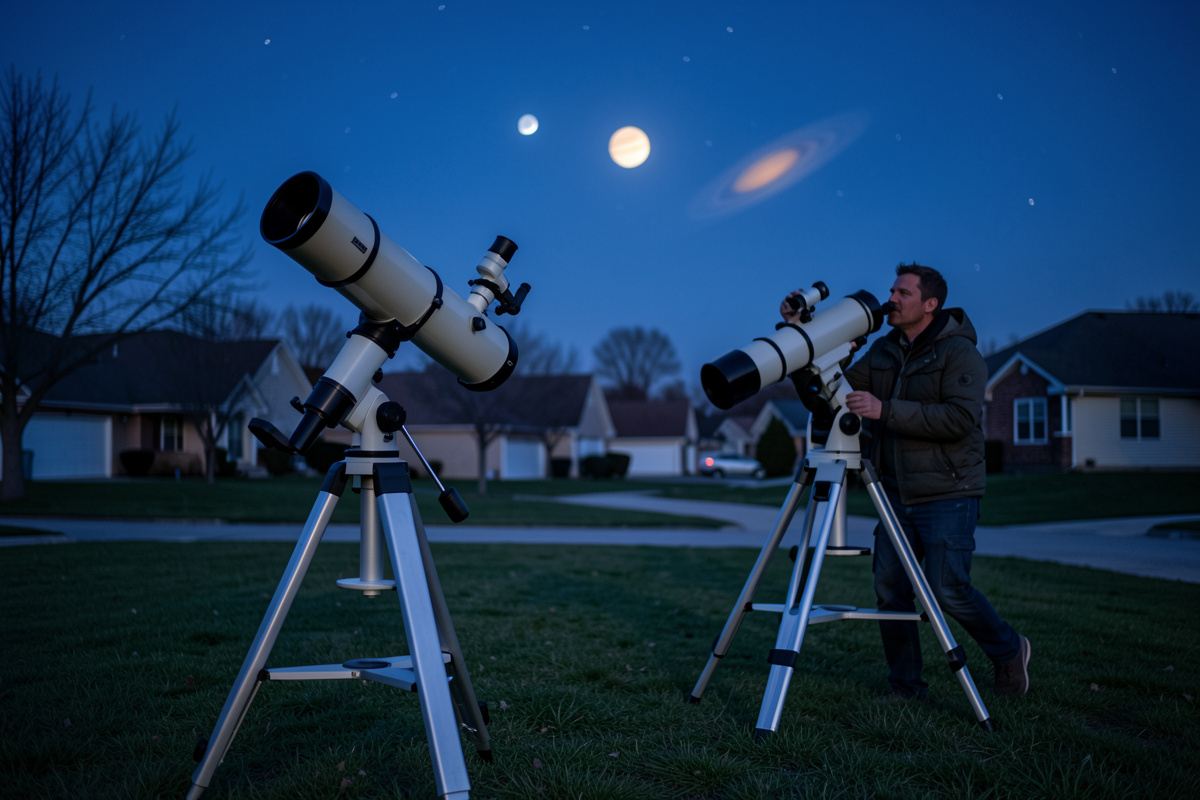
I observe from two sites in Sweden: a Bortle 4-6 suburban backyard that most readers will recognise as “normal,” and a darker Nordic site I drive to. From a high northern latitude the planets ride low through thick, turbulent air for half the year, which has made me ruthless about the things that actually matter for planetary detail. This guide is the distillation of years of putting a 12-inch Dobsonian, a 127mm Maksutov, an 8-inch SCT, and a 100mm ED apo on the same lawn and pointing them at the same planet on the same night. Spoiler: the answer surprises people.
What “planetary performance” actually means
Deep-sky observing — galaxies, nebulae, faint clusters — is a game of raw light grasp. You want the biggest aperture you can carry to a dark site, because every photon counts. Planetary observing is a different sport entirely. The planets are bright; you are never short of light. What you are short of is contrast and resolution at high magnification — the ability to split a fine cloud belt from the disc beside it, to hold the Cassini Division crisp, to catch the subtle ochre of a Martian surface feature without it smearing into the limb.
That reframes the whole buying decision. Three things drive planetary performance, roughly in this order of practical importance:
- Optical quality and contrast. A scope with a smooth, well-figured optical surface and minimal central obstruction delivers higher contrast at the eyepiece than a larger but optically mediocre instrument. This is where cheap “department store” scopes fall apart.
- Aperture — but for resolution, not light. More aperture resolves finer detail (the diffraction limit shrinks as the mirror grows). A 10-inch resolves features a 4-inch simply cannot. But that resolution is only usable when the atmosphere cooperates, which is the catch.
- A mount that holds high power dead still. Planetary observing lives at 150x to 300x. At those magnifications a wobbly mount turns the planet into a trembling blur the instant you touch the focuser. Beginners chronically under-spend here, and it ruins more planetary sessions than bad optics ever do.
The telescope designs, ranked for planets
Every common telescope design can show you the planets. They are not equal at it. Here is how I’d rank them for a planetary-priority buyer, with the honest caveats. If you want the full design-by-design breakdown for general use, I wrote a longer piece on reflector vs refractor designs that pairs well with this.
Maksutov-Cassegrain and SCT (catadioptric)
A long-focal-length Maksutov-Cassegrain is, gram for gram and dollar for dollar, the planetary specialist’s secret. My 127mm Mak is the scope I grab first when the sky steadies and the target is Saturn. Long native focal ratios (f/12 to f/15) deliver high magnification with comfortable, inexpensive eyepieces, the closed tube resists tube currents once it has cooled, and the contrast on a steady night is genuinely lovely. The trade-off is a smaller central obstruction than an SCT and slow cooldown. The 8-inch SCT is the do-everything cousin — more aperture, a touch more obstruction, slightly softer contrast per inch, but a serious planetary performer when collimated and acclimated.
Apochromatic refractor
Aperture-for-aperture, a good apo gives the most contrasty planetary image of any design — no central obstruction, no spider diffraction, just clean glass. My 100mm ED triplet shows a textbook Jupiter. The problem is money and aperture ceiling: a 4-inch apo costs what an 8-inch SCT costs, and at some point physics wins and the bigger obstructed scope simply resolves finer detail. Refractors are the connoisseur’s planetary choice up to about 5 inches; beyond that the price becomes absurd.
Dobsonian / Newtonian reflector
Here’s the surprise that upsets the refractor purists: on the best nights, my 12-inch Dob shows more planetary detail than anything else I own. Aperture wins on resolution when the seeing is steady enough to use it. The catch is that a fast Newtonian needs good collimation to deliver that — read my collimation guide before you blame the optics — and a large obstruction lowers contrast on planets compared to an apo of the same aperture. But you’ll never afford a 12-inch apo, and for the cost the Dob is unmatched. If value is your priority, my piece on why Dobsonians are the best value makes the full case.
Comparison: telescope designs for planetary observing
| Design | Typical f-ratio | Planetary contrast | Resolution ceiling | Cooldown | Best for |
|---|---|---|---|---|---|
| Maksutov-Cassegrain (127mm) | f/12-f/15 | Excellent | Modest aperture | Slow | Grab-and-go planetary specialist |
| SCT (8-inch) | f/10 | Very good | High | Slow | Do-everything with serious aperture |
| ED/Apo refractor (100mm) | f/5.5-f/9 | Reference / best per inch | Limited by cost | Fast | Contrast purists, also imaging |
| Dobsonian/Newtonian (8-12 in) | f/4.5-f/6 | Good (obstruction-limited) | Highest for the money | Moderate | Max detail on steady nights, best value |
| Achromatic refractor (cheap) | f/5-f/8 | Fair (chromatic aberration) | Low | Fast | Budget Moon/quick looks |
Notice what’s not on this table: a magic best-buy model. The “best telescope for planets” is whichever of these matches your portability, budget, and how often the air over your site actually steadies. For an apartment dweller carrying gear down stairs, the 127mm Mak wins. For a buyer with a car and a love of fine detail, the 8-inch SCT or a mid-size Dob wins. For someone who also wants to image, the apo earns its keep twice.
Aperture, magnification, and the limit the sky imposes
The most common beginner error is chasing magnification. You can theoretically run a telescope at about 50x per inch of aperture — so 250x on a 5-inch scope — but you almost never get to use it, because the atmosphere blurs the image long before the optics run out. This is seeing, the turbulence in the column of air between you and the planet, and it is the single biggest limiter of planetary detail there is. On a mediocre night even my 12-inch is capped around 150x by the sky, not the mirror.
This is why I tell people to stop obsessing over the highest number on the box. The useful magnification on any given night is whatever the seeing allows, and learning to read the air is a bigger skill than buying a bigger scope. Choosing the right power for the conditions, and learning to read and time the atmosphere, will do more for your views than any upgrade. My atmospheric seeing for planetary observing guide explains exactly how to read the air, rate seeing conditions, and decide when to push to high power and when to back off. The best magnification for planets guide goes deep on the seeing-limited ceiling, the exit-pupil math, and exactly how to step through powers on a live target.
A quick rule of thumb I use at the eyepiece: start low, find the planet, then step the magnification up one eyepiece at a time. The moment the image stops getting sharper and merely gets bigger and dimmer, you’ve passed the seeing ceiling for that night — back off to the last sharp step and stay there. Some of my best Saturn views have been at a modest 140x on a steady night, while a “180x” session on a turbulent one showed less detail despite the bigger image. The full breakdown of what you can realistically expect to see at each aperture and magnification — rings, Cassini Division, shadow transit — is in the seeing Saturn’s rings with a telescope guide. Magnification is a tool, not a trophy.
The Nordic-latitude reality nobody mentions
Here’s a wrinkle that no mid-latitude reviewer will tell you, because they’ve never lived it. From a high northern latitude the planets ride low across the southern sky for much of the year, and low means you’re looking through a thick, turbulent slab of atmosphere — the worst possible seeing. In a Swedish winter the planets that culminate high in the south are the ones to chase; the ones that never climb far above the horizon will frustrate you no matter how good your scope is. This single fact reshapes the “best telescope for planets” question for northern observers: a smaller, high-contrast scope used on the rare night the air steadies will beat a giant light bucket fighting horizon murk. It’s the same lesson the deep-sky observer learns about transparency, inverted — for planets, altitude above the horizon is everything.
The eyepieces and accessories that actually move the needle
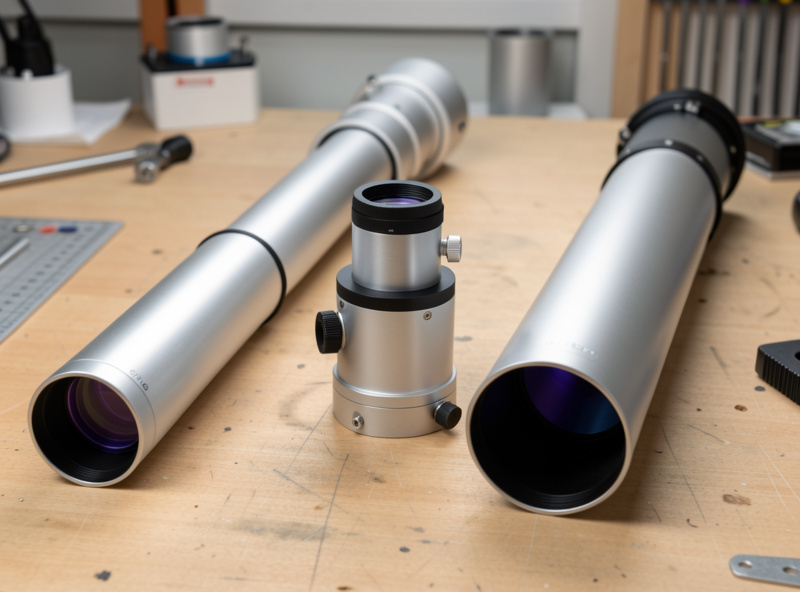
The eyepiece is half the optical system, and the kit pieces that come in the box are usually the weakest link on a planetary night. You don’t need a drawer of glass — for planets you need two or three good focal lengths that land you in the right magnification range, plus a Barlow to extend them. My full reasoning is in the best telescope eyepieces guide, but the planetary-specific version is short: prioritise a quality eyepiece in the 6mm-9mm range (your high-power workhorse), keep a mid-power around 12mm-15mm for poorer seeing, and add a good Barlow lens rather than buying ever-shorter eyepieces. A Barlow doubles your usable focal lengths from the same eyepieces and keeps eye relief comfortable.
Filters are the other lever. A neutral-density Moon filter tames the glare off a near-full Moon, and a set of coloured planetary filters can lift specific features — a light blue to bring out Jupiter’s belts, an orange to deepen Martian surface contrast. The planet-by-planet filter recommendations get their own deep dive in my eyepiece filters for planets guide, and the broader filter landscape is in the general telescope filters guide. Don’t overdo it — filters are a refinement, not a rescue for a poor scope or a bad night.
One accessory beginners skip and shouldn’t: a way to hold high power steady. If your mount judders at 200x, no eyepiece will save the view. And if you’re star-hopping to a planet rather than using GoTo, a decent finder scope or red dot makes acquisition painless — though the bright planets are easy naked-eye targets to begin with.
The mount: where planetary sessions are won or lost
I cannot say this loudly enough: the mount matters as much as the optics for planets, and it is where new buyers under-spend most reliably. At 200x the planet drifts across the field in seconds, every breeze sets the tube ringing, and a soft focuser feels like trying to thread a needle on a trampoline. A rock-solid alt-azimuth or Dobsonian rocker box, or a properly loaded equatorial, transforms a frustrating session into a relaxed one. If you want to understand the trade-offs, my telescope mount types guide walks through alt-az vs equatorial vs GoTo from experience. For pure visual planetary work, smooth and stiff beats feature-laden and flimsy every time.
GoTo helps you find planets, but the planets are the easiest things in the sky to find — they’re the bright “stars” that don’t twinkle. I’d rather a beginner spend the GoTo premium on a steadier mount and learn to recognise the planets by eye. That said, tracking (the mount following the sky so the planet stays centred) is a genuine luxury at high power, and it’s the one place GoTo earns its money for visual planetary observers.
Cooldown, collimation, and the free upgrades
Two habits cost nothing and do more for planetary detail than a gear upgrade. The first is thermal acclimation: a warm telescope sheds heat through its tube and across its optics, and those rising currents shred fine detail. Put the scope outside thirty to sixty minutes before you observe (longer for a big closed-tube SCT or Mak) and let it reach ambient temperature. The difference on Saturn between a warm scope and a cooled one is night and day, and it’s the most common reason a new owner’s planets look soft.
The second is collimation for reflectors. A Newtonian or SCT with misaligned optics throws away contrast precisely where planetary detail lives. It takes minutes once you learn it, and my collimation guide makes it painless. A perfectly collimated 8-inch will bury a misaligned 10-inch on planets.
Planet by planet: what to expect and where to go deeper
Each planet rewards a slightly different approach. Here’s the short orientation, and the dedicated technique guides in this cluster go deeper on each one.
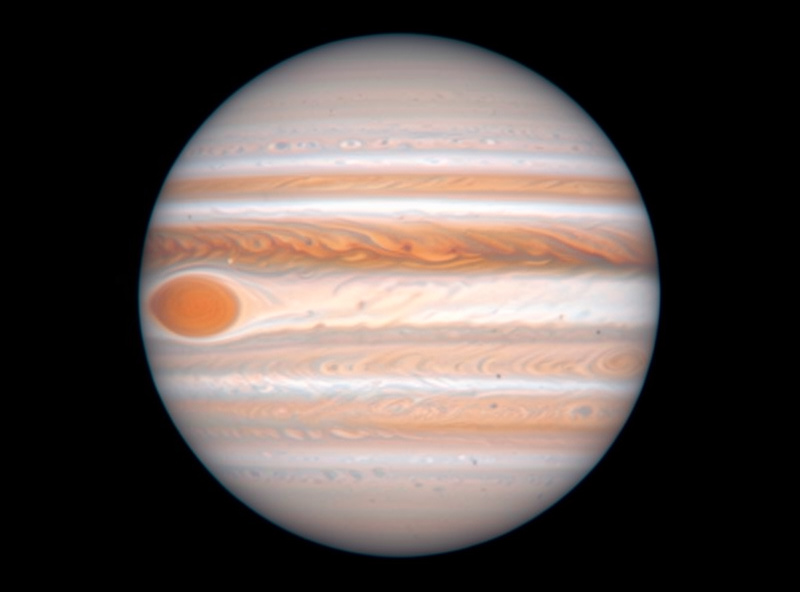
Jupiter is the gift that keeps giving — two dark equatorial belts even in a small scope, four Galilean moons shifting nightly, and the Great Red Spot rotating into view on a schedule you can plan around. It’s the best first planetary target there is, and the one I send every new observer to before anything else. The feature tour of Jupiter through a telescope covers what each band, festoon, and moon actually looks like at the eyepiece. When you are ready to work a full session around Jupiter specifically — timing the GRS, logging belt changes, and sketching the moons — the step-by-step breakdown is in my how to observe Jupiter with a telescope guide.
Saturn is the planet that makes people gasp at the eyepiece for the first time. The rings are real, three-dimensional, and unmistakable even at modest power. Getting the Cassini Division and the ring tilt to snap into focus is a seeing-and-aperture game, and the visual walkthrough lives in Saturn’s rings through a telescope.
Mars is the connoisseur’s challenge — a tiny disc most of the time that swells into a detail-rich target only around opposition, when Earth laps it on the inside track. Catching polar caps and dark surface markings takes aperture, filters, and patience — and the window is brief. The observing Mars at opposition guide covers the exact timing, the filters that bring surface features out, and the aperture minimum that makes the detail worth chasing. The general timing of when each planet is best placed is in the planets at opposition guide.
Venus shows no surface detail through any amateur scope — its permanent cloud deck sees to that — but it runs through a full set of phases like a tiny Moon, from gibbous to a dramatic thin crescent. Watching that cycle is one of the quiet pleasures of planetary observing — the full visual guide to what you see and when is in my Venus phases through a telescope guide.
The Moon deserves a mention even though it isn’t a planet, because it’s the gateway drug and the best place to learn the craft of high-power observing — crater shadows, mountain ranges, and rilles that sharpen and soften with the seeing exactly the way the planets do. Practise your focusing and your patience on the Moon; my Moon observation guide is where I’d start. For the wider orientation — including the faint ice giants Uranus and Neptune and the elusive inner planet Mercury — my planetary observation guide and the practical how to observe planets with a telescope tutorial fill in the rest, and if you’re still choosing targets by season the best planets to observe roundup is a good companion.
The mistakes that kill new observers’ planetary nights
After watching countless beginners come and go, the failures cluster into a short, predictable list — and not one of them is “I bought the wrong telescope.” Avoid these and you’ll out-observe people with far more expensive gear.
- Observing through a warm scope. The number-one reason a beginner’s Saturn looks like a fuzzy oval. Cool the optics before you expect detail. Free fix, enormous payoff.
- Cranking the magnification to the maximum on the box. That 600x eyepiece kit on a 3-inch department-store scope is marketing fiction. Empty magnification just amplifies blur. Match power to seeing.
- Skipping collimation on a reflector. A misaligned mirror dumps contrast straight into the bin. It’s a five-minute habit once learned.
- Under-spending on the mount. A great OTA on a shaky tripod is a frustrating great OTA. The mount is not the place to save money for planetary work.
- Observing on the wrong night. A crystal-clear, high-transparency night is often a turbulent one (the same cold front that cleared the haze stirred the air). The hazy, still nights frustrate deep-sky observers but can deliver gorgeous planetary seeing. Learning that inversion is half the battle.
- Expecting a poster. The planets are small and shimmer. The reward is in the patient moments when the air stills and detail blooms — not in a single freeze-frame. Manage expectations and you’ll fall in love with it.
A simple planetary session workflow
This is the routine I run, stripped to its essentials, whether I’m using the grab-and-go Mak or hauling out the big Dob:
- Put the scope out early. Thirty to sixty minutes (more for a large closed tube) so the optics reach ambient temperature.
- Check collimation if it’s a reflector — a quick star test once it’s dark confirms it.
- Acquire at low power. Find the planet with your lowest-power eyepiece; it’s the brightest non-twinkling “star” in that part of the sky.
- Centre and let the eye adapt. Spend a few minutes actually looking — planetary detail emerges to the patient eye, not the glancing one.
- Step up the power one eyepiece at a time until the image stops sharpening, then drop back to the last crisp step.
- Add a filter if it helps — a Moon filter for glare, a coloured filter for a specific feature — but only if it genuinely lifts the view.
- Wait for the moments of steady air. The atmosphere comes and goes in waves; the finest detail appears in brief windows of calm. Stay at the eyepiece and you’ll catch them.
So what should you actually buy?
If I’m playing the real-friend test — what would I genuinely tell someone to buy for the planets — the honest answer depends on three questions: How much can you carry? How much can you spend? How often does the air over your site steady down?
- Tight budget, small space, planets first: a 127mm Maksutov-Cassegrain on a solid alt-az mount. Long focal ratio, high contrast, fast to deploy, forgiving eyepieces. It punches absurdly above its aperture on the Moon and planets.
- Mid budget, want detail and some deep-sky too: an 8-inch SCT or an 8-inch Dobsonian. The SCT if you value the closed tube and tracking; the Dob if value and raw aperture win. Both will show you everything in this guide.
- Bigger budget, max planetary detail on good nights: a 10-12 inch Dobsonian. Keep it collimated, let it cool, wait for the steady nights, and it will out-resolve anything reasonable. It’s the most planetary detail per dollar, full stop.
- Contrast purist who also images: a 4-5 inch ED/apo refractor on a good mount. The cleanest planetary image per inch, and it pulls double duty for wide-field astrophotography.
Whatever you choose, spend on the mount, budget for two good eyepieces and a Barlow, learn to cool and collimate, and — most importantly — manage your expectations about the sky. The planets are not posters; they are living, shimmering little worlds that reveal themselves to the patient observer who waits for the air to still. Get the priorities right and the “best telescope for planets” stops being a product and starts being a practice. If you’re brand new to the whole thing, start with my telescope buying guide and the beginner’s astronomy guide, then come back here when the planets start calling.